A wobbly wheel is more than an annoyance; it’s a critical sign of systemic stress that, if misdiagnosed, can lead to catastrophic failure.
- A single broken spoke is rarely an isolated incident but a symptom of widespread metal fatigue across the entire wheel.
- Rim wear is a non-negotiable limit. A concave brake track means the wheel’s structural integrity is compromised and it must be replaced.
Recommendation: Learn to read the signs of terminal wear before attempting a repair. An honest diagnosis is the most important skill for any cyclist.
That rhythmic ‘swish-swish’ of a rim hitting a brake pad is a sound every cyclist knows and dreads. It’s the tell-tale heart of a wheel in distress. The common reaction is to grab a spoke wrench and tighten the first loose spoke you find, hoping to silence it. But this approach often mistakes a symptom for the disease. A wobbly wheel isn’t just a simple alignment issue; it’s a complex story of balanced forces, metal fatigue, and environmental wear. Trying to fix it without understanding the underlying causes is like trying to navigate by looking only at your feet.
A wheel is a complete system. The hub, spokes, nipples, and rim work in constant, dynamic tension. When one part fails, the load shifts, and a cascade of problems can begin. Before you can decide whether to true a wheel or retire it, you must learn to act as a diagnostician. You need to read the signs, understand the material limits, and make an honest, informed judgment. This isn’t just about achieving a perfectly true wheel; it’s about knowing when a wheel is no longer safe to ride, a distinction that can mean the difference between a satisfying repair and a sudden, dangerous failure on the road.
This guide will walk you through the craftsman’s diagnostic process. We’ll move beyond simple truing to understand the deeper signs of a wheel’s health. We will explore how to assess the true nature of a wobble, identify the hidden killers like rim wear and spoke fatigue, and understand how even the smallest component choice can determine a wheel’s fate. By the end, you will be equipped not just to fix a wobble, but to decide if the wheel is even worth saving.
Summary: A Craftsman’s Guide to Diagnosing a Buckled Wheel
- The Zip-Tie Method: How to True a Wheel Without a Truing Stand?
- Broken Spokes: Why Replacing Just One Often Leads to More Snapping?
- Concave Rims: How to Check If Your Rim Is About to Explode?
- Brass vs Alloy Nipples: Why Alloy Seizes in UK Winters?
- Wheel Dishing: Why Your Tyre Is Rubbing One Side of the Frame?
- Can You Trust a Repaired Carbon Frame After a Crash?
- Presta Valve Core Removal: The CO2 Error That Leaves You Stranded?
- Is Buying a Cheap Carbon Frame Worth the Risk on UK Roads?
The Zip-Tie Method: How to True a Wheel Without a Truing Stand?
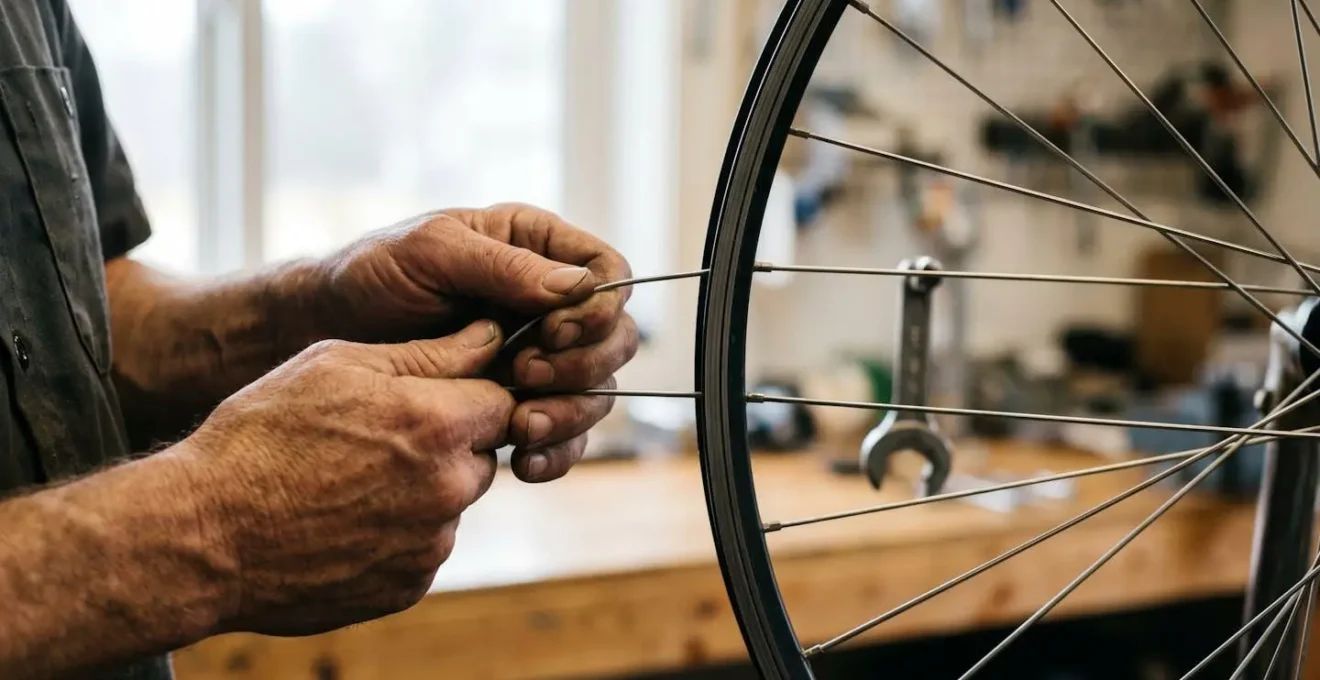
The truing stand is the altar of the wheel builder’s workshop, but you don’t need one for effective roadside or garage repairs. The zip-tie method is a classic field-expedient technique that relies on patience and a sensitive touch. By attaching a zip-tie to your frame or fork, you create a precise reference point to gauge the rim’s lateral (side-to-side) and radial (up-and-down) runout. The key is not brute force, but making small, incremental adjustments—no more than a quarter-turn of the spoke nipple at a time. This prevents overcorrection and ensures you’re pulling the rim into alignment, not just creating a new problem elsewhere.
Before you begin, apply a drop of light oil to each spoke nipple. This allows the nipple to turn smoothly on the spoke threads, preventing the spoke itself from twisting—a common mistake that adds torsional stress without actually changing tension. To pull the rim to the right, you tighten a spoke originating from the right hub flange; to pull it left, you tighten a left-side spoke. To fix a ‘hop’ or high spot, you tighten the spokes on both sides in that area. Always remember to work on the problem area by adjusting a group of 3-5 spokes, not just one, to distribute the tension changes.
The most overlooked step, and the one that separates a temporary fix from a lasting repair, is stress-relieving the wheel. After making adjustments, firmly squeeze parallel pairs of spokes together all around the wheel. You may hear some ‘pinging’ as the spoke heads and nipples settle into their new positions. This process seats the components properly and releases any built-up torsional stress in the spokes. A wheel that hasn’t been stress-relieved will often go out of true again on the first ride.
This tactile technique of squeezing spokes is a fundamental part of the craft, ensuring the balanced tension you’ve worked to achieve is stable and will hold under riding forces. It’s the final, crucial step in convincing the wheel to hold its new, true shape.
Broken Spokes: Why Replacing Just One Often Leads to More Snapping?
When a single spoke snaps, it feels like a simple, isolated failure. The temptation is to thread in a new one, true the wheel, and get back on the road. This is a critical error in diagnosis. A broken spoke is rarely an accident; it’s a symptom of systemic fatigue. Think of your wheel’s spokes as a team. They have all been subjected to the same number of stress cycles, the same road impacts, and the same environmental conditions. When one fails from fatigue, it’s a strong indicator that its neighbours are also nearing the end of their service life.
The forces involved are immense; fatigue analysis research on bicycle wheel spoke patterns shows that even a short ride adds thousands of tension-release cycles. A new spoke introduced into a group of old, fatigued ones creates a significant tension imbalance. The new spoke is strong and stiff, while the old ones have become more elastic. This forces the older spokes to carry disproportionate loads, accelerating their failure and leading to a « tension cascade. » As the Superteam Wheels technical team notes, « Once a spoke fails, the imbalance becomes worse, increasing the risk of a cascade of failures—unless the wheel is promptly serviced and re-tensioned correctly. »
Consider the real-world case of a Liv Intrigue trail bike. After the first spoke broke and was replaced, the rider experienced repeated failures, with a new spoke snapping every few rides. An investigation revealed the obvious truth: all the original spokes had reached their fatigue limit at roughly the same time. The only permanent solution was a complete wheel rebuild with a fresh set of spokes, all properly tensioned by hand. This eliminated the failure cascade and restored the wheel’s reliability. Replacing just one spoke is patching a sinking ship; a full re-spoke is the only way to ensure long-term structural integrity.
Concave Rims: How to Check If Your Rim Is About to Explode?
While spoke issues can often be fixed, there is one condition that is a definitive death sentence for a wheel: a worn-out rim. For wheels with rim brakes, the brake pads act like fine-grit sandpaper, slowly grinding away the rim’s sidewall with every stop. Over thousands of miles, this erosion thins the metal, creating a dangerous concave profile. The rim’s sidewall is a critical structural element, responsible for containing the high pressure of the tyre. When it becomes too thin, it can no longer withstand these forces.
The failure is not gradual; it is sudden and catastrophic. As one forum user on Cycling UK described with grim accuracy, « the tyre pressure tears the rim lip from the rim and the normal result is a dramatic blowout, with the wheel possibly jamming between the brakes as it happens. » This is not a wobble; it is an explosion. An honest diagnosis of your rim’s health is therefore the most important safety check you can perform on your bicycle. A perfectly true wheel with a worn-out rim is a time bomb.
Fortunately, you don’t need special tools to assess this wear. You can perform several simple checks at home. Look for a wear indicator—many rims have a small hole or a groove in the sidewall that disappears when the rim is worn out. If there’s no indicator, use the ‘straightedge test’: place a metal ruler or a credit card across the brake track. If you can see a significant gap of daylight between the ruler and the center of the track, the rim is dangerously concave. Finally, a ‘pulsing’ sensation when you brake is a sign of uneven rim thickness, another warning that the material is approaching its failure point.
Checklist: Auditing Your Rim’s Structural Integrity
- Points of contact: Identify all areas where the rim shows wear. Is it uniform across the brake track or are there dips and bulges?
- Collecte: Inventory the signs. Measure the concavity with a straightedge. Look for the disappearance of wear indicators. Note any pulsing during braking.
- Cohérence: Confront the rim’s condition with safety standards. Does the visible wear exceed the manufacturer’s limits (even if informal)?
- Mémorabilité/émotion: Distinguish between benign scratches and critical wear. A deep, concave groove is a ‘unique’ sign of impending failure, not a generic scuff.
- Plan d’intégration: Based on the audit, make a clear decision. If the rim is concave or the wear indicator is gone, the plan is simple: replace the wheel immediately.
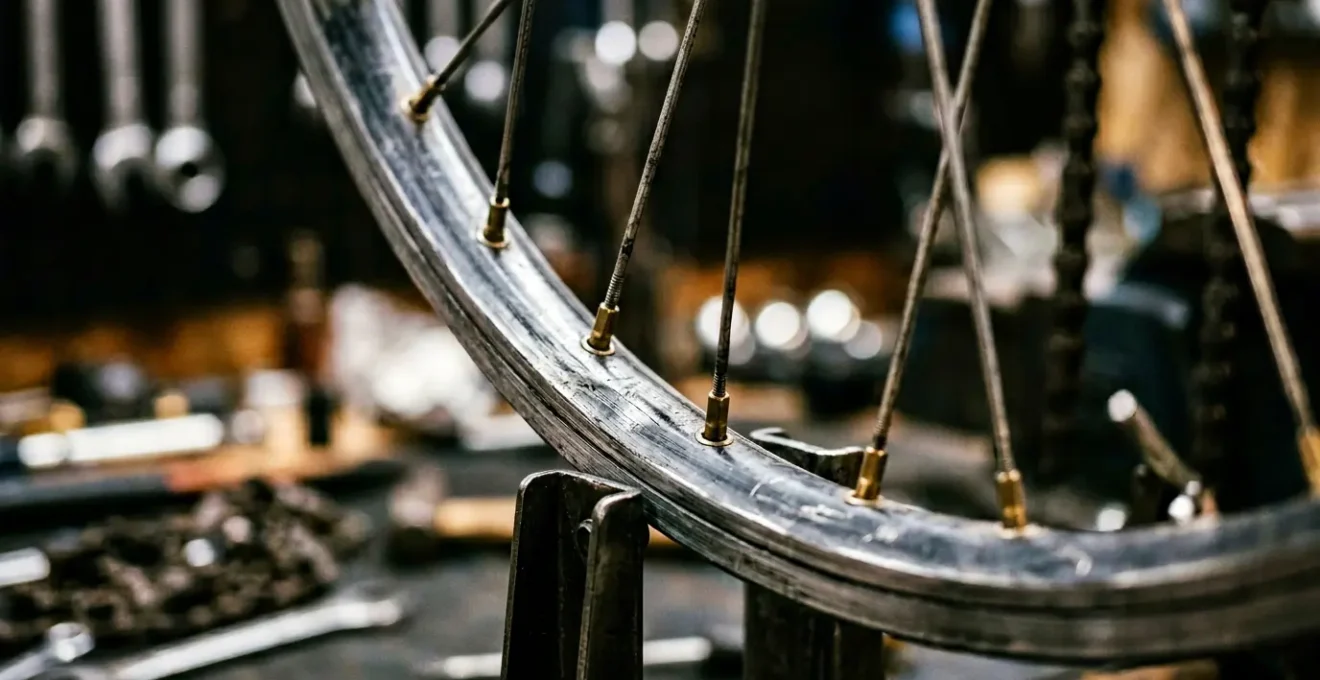
Brass vs Alloy Nipples: Why Alloy Seizes in UK Winters?
The dialogue between materials is a constant conversation happening on your bike, and nowhere is it more critical than at the spoke nipple. The choice between brass and aluminum (alloy) nipples seems like a minor detail—a question of a few grams—but it has profound implications for a wheel’s longevity, especially in harsh climates. Alloy nipples are lightweight and come in flashy anodized colours, making them a popular choice for race-day and weight-conscious builds. Brass nipples are heavier, more traditional, and far more durable. The difference comes down to one thing: galvanic corrosion.
As the experts at Superteam Wheels explain, « Galvanic corrosion occurs when two dissimilar metals (like stainless steel and aluminum) come into contact with each other in the presence of an electrolyte. » In the context of a UK winter, that « electrolyte » is the salt-laden, gritty spray constantly kicked up from the road. The stainless steel spoke and the aluminum nipple create a small galvanic cell, and the aluminum nipple sacrificially corrodes. It turns into a white, crusty oxide, effectively welding itself to the spoke. At this point, the nipple can no longer be turned. The wheel cannot be trued. The only solution is to cut all the spokes and start over.
This is where the humble brass nipple proves its worth. Brass is much closer to stainless steel on the galvanic scale, so corrosion is vastly reduced. It is also a much stronger material that resists rounding off under a spoke wrench. A wheel built with brass nipples may be a few grams heavier, but it will remain serviceable for years, even after being subjected to the worst winter conditions. This table, based on data comparing nipple performance, makes the choice clear for any serious all-weather rider.
| Characteristic | Brass Nipples | Aluminum Nipples |
|---|---|---|
| Weight per nipple | ~1.0 gram | ~0.33 gram |
| Corrosion resistance | High durability in wet/salt conditions | Prone to galvanic corrosion with steel spokes |
| Serviceability after exposure | Remains adjustable even after years | Can seize completely, requiring wheel rebuild |
| Best application | All-weather commuting, UK winter riding, touring | Fair-weather racing, weight-focused builds |
| Cost of failure | Rare—rim wear typically comes first | High—seized nipples force complete re-spoke |
The visual evidence is undeniable. A seized alloy nipple is a monument to a poor material choice for the given environment. For a wheel that is expected to last, especially on British roads, brass is not just an option; it is the professional standard.
Wheel Dishing: Why Your Tyre Is Rubbing One Side of the Frame?
You’ve trued your wheel to perfection. It spins without a wobble, yet when you install it in the bike, the tyre rubs stubbornly against one chainstay. The problem isn’t the wheel’s trueness, but its ‘dish’. Dishing refers to the centering of the rim over the hub’s locknuts—the parts that actually contact the frame. A correctly dished wheel will be perfectly centered between the frame’s dropouts. An incorrectly dished wheel will be offset to one side, even if it is perfectly true relative to its own hub.
This is especially critical for rear wheels. As the technical experts at Park Tool explain, « the left and right flanges are not at equal distance from the hub center. The drive side spokes are offset inward to allow room for the sprockets. » To compensate for this asymmetry, the drive-side spokes must be under significantly higher tension and are shorter than the non-drive-side spokes. This pulls the rim into the correct centered position. If this tension balance is off, the rim will drift to one side. An even tension that is too low can also allow the wheel to shift under load, causing the tyre to rub when you’re cornering hard or climbing out of the saddle.
You can perform a quick diagnostic without a dishing tool. Install the wheel and note which side it rubs. Then, remove the wheel, flip it 180 degrees, and reinstall it. If the rim now rubs on the opposite side of the frame, the wheel is definitively out of dish. Correcting dish is an advanced truing operation. To move the rim to the right, for example, you would tighten all the spokes on the right side by a quarter turn and loosen all the spokes on the left side by a quarter turn. This is a delicate process that requires maintaining the wheel’s lateral and radial true while shifting its center. It’s a true test of a wheel builder’s skill.
Can You Trust a Repaired Carbon Frame After a Crash?
The diagnostic mindset we apply to wheels is even more critical when assessing a carbon frame after a crash. Unlike metal, which bends and dents, carbon fibre composite fails by cracking and delaminating. The danger is that the most serious damage is often invisible. A surface scuff might hide a network of internal delaminations—layers of carbon separating beneath the surface—that have catastrophically weakened the structure. Simply filling and sanding a visible crack is cosmetic surgery on a terminal patient.
Making an honest diagnosis of a carbon frame requires specialist knowledge and tools. A reputable carbon repair specialist won’t just look at the damage; they will ‘tap test’ the entire area, listening for a dull thud that indicates delamination instead of the sharp ‘tick’ of a solid laminate. For critical areas, they will use ultrasound inspection, the same technology used in aerospace, to map the extent of the subsurface damage. Without this level of scrutiny, you are simply guessing about the frame’s integrity.
So, can you trust a repaired frame? Yes, but only if the diagnosis and repair were performed by a top-tier expert who guarantees their work. A proper repair involves removing all the damaged material, rebuilding the layers with fresh pre-preg carbon, and curing it under pressure and heat to restore the original structural properties. It is a meticulous, expensive process. A cheap repair is a terrifying prospect. The ultimate question is one of trust—not in the material, but in the hands that repaired it. If you have any doubt, the only safe decision is to replace the frame.
Presta Valve Core Removal: The CO2 Error That Leaves You Stranded?
Sometimes the failure isn’t structural, but a simple mechanical mistake that can stop a ride just as effectively. One of the most common, and frustrating, is accidentally unscrewing your Presta valve core while trying to fix a flat. This is a classic error for those new to thread-on CO2 inflators. The sequence of events is painfully familiar: you thread the inflator onto the valve, but in your haste, you either cross-thread it or tighten it with such force that it binds to the removable valve core.
The tyre inflates correctly. But when you go to unscrew the inflator, it doesn’t release from the valve stem. Instead, the entire valve core unscrews along with the inflator head. The result is an instantaneous and complete loss of all air pressure, often accompanied by the valve core flying off into the roadside gravel, lost forever. You are now stranded with a flat tyre and a non-functional valve. This single mistake, born from a moment of panic, can end a ride.
The craftsman’s solution is twofold: prevention and preparedness. First, before you ever leave the house, use a small valve core tool (or a pair of needle-nose pliers) to gently snug down the valve cores on your tubes or tubeless valves. They often come loose from the factory. This small amount of torque is usually enough to prevent the inflator head from gripping it. Second, always carry a spare valve core and a core removal tool in your saddlebag. They are minuscule and weigh almost nothing, but having them allows you to fix this specific problem in seconds, rather than resorting to a long walk home. It’s a simple piece of preparation that demonstrates a deeper understanding of the systems you rely on.
Key takeaways
- A single broken spoke is a warning sign of systemic fatigue; replacing only one often leads to a cascade of failures.
- A concave rim from brake wear is a non-repairable, critical safety failure. If a straightedge shows daylight, the wheel is finished.
- Material choice matters: In wet, salty conditions like UK winters, corrosion-resistant brass nipples are essential for long-term serviceability over lighter alloy.
Is Buying a Cheap Carbon Frame Worth the Risk on UK Roads?
The allure of a cheap, unbranded carbon frame is powerful. It promises high-end performance and low weight at a fraction of the cost of a frame from a reputable manufacturer. However, applying our diagnostic mindset to this purchasing decision reveals the hidden risks. The price difference isn’t just marketing; it’s a reflection of quality control, materials, and engineering. Reputable brands spend millions on research, development, and rigorous testing. They discard a significant number of frames that fail their stringent quality control checks.
With a cheap carbon frame, you are essentially buying a product that has bypassed this entire process. Common issues include voids in the resin, poor compaction, and misaligned carbon plies—all invisible defects that create weak spots. On the notoriously potholed and poorly maintained roads of the UK, a frame is subjected to constant, high-frequency vibrations and sharp impacts. These stresses will exploit any manufacturing defect, potentially leading to a sudden, catastrophic failure without warning.
Furthermore, these frames often suffer from poor alignment. Dropouts might not be parallel, the bottom bracket shell might be out of true, and the headtube could be misaligned. These issues make the bike difficult to build, cause premature wear on components like bearings and drivetrains, and can result in poor handling and instability. The money you save on the initial purchase is quickly eaten up by frustration, replacement parts, and, most importantly, an unacceptable level of risk. An honest diagnosis would conclude that the « value » is an illusion. Your safety is worth more than the few hundred pounds saved on a frame that has no verifiable history or accountability.
Apply this craftsman’s diagnostic mindset to every component on your bike. Question the symptoms, investigate the underlying causes, and respect the limits of the materials. This approach will not only make you a more competent mechanic but a safer and more confident cyclist.