Uneven brake pad wear is almost never a caliper alignment issue; it’s a critical symptom of a deeper hydraulic imbalance.
- Sticky pistons are caused by contamination or seal degradation, not a lack of lubrication.
- A spongy lever without visible leaks often points to water-contaminated fluid boiling inside the system (vapor lock).
Recommendation: Before adjusting any bolts, perform a full piston and fluid system diagnosis to find and fix the true source of the problem.
You’ve noticed one brake pad is worn down to the backing plate while the other looks almost new. The common advice is to loosen the caliper bolts, squeeze the lever, and retighten. Sometimes this works, but often, it’s a temporary fix for a much deeper problem. The rapid, uneven wear is not the problem itself; it is a symptom. It’s the final, desperate signal from a hydraulic system suffering from a systemic imbalance. Ignoring this signal and simply realigning the caliper is like turning up the radio to ignore a knocking engine.
This diagnostic guide moves beyond the simple fixes. We will treat your brake not as a collection of parts, but as a closed hydraulic system where every component’s health affects the others. Instead of just treating the symptom, we will learn to interpret the subtle language of your brakes—the tell-tale dampness of weeping fluid, the spongy feel of a lever that hints at invisible issues, and the specific sounds that differentiate a minor annoyance from a critical failure. This is not about simply replacing parts; it is about performing a hydraulic diagnosis to find the root cause.
By understanding the interplay between pistons, seals, fluid, and contamination, you can move from a parts-fitter to a true technician. You will learn to identify a seized piston, differentiate it from a misaligned caliper, understand the catastrophic effects of fluid contamination, and ultimately make the right choice in pad compound for your specific riding conditions. This approach will not only save you money on prematurely worn rotors but will ensure your brakes perform with the power and reliability you depend on.
This article provides a complete diagnostic framework to help you trace the issue back to its source. Follow this structured approach to move from symptom to solution, ensuring every part of your braking system is working in perfect harmony.
Summary: A Technician’s Guide to Diagnosing Uneven Braking
- Cotton Buds and Brake Fluid: How to Mobilize Seized Pistons Safely?
- Fluid Weeping: Is That dampness Around the Caliper Dangerous?
- Spongy Levers: Why Air Enters the System Even Without Leaks?
- Centering the Caliper: Why Loosening Bolts Isn’t Always the Fix?
- DOT vs Mineral Oil: Why Mixing Them Destroys Your Seals Instantly?
- Creak or Click: How to Identify Worn Bushings Without Tools?
- Spray Contamination: How One Drop of GT85 Can Ruin Your Braking?
- Sintered vs Organic Pads: Which Survives Grit Best in the Pennines?
Cotton Buds and Brake Fluid: How to Mobilize Seized Pistons Safely?
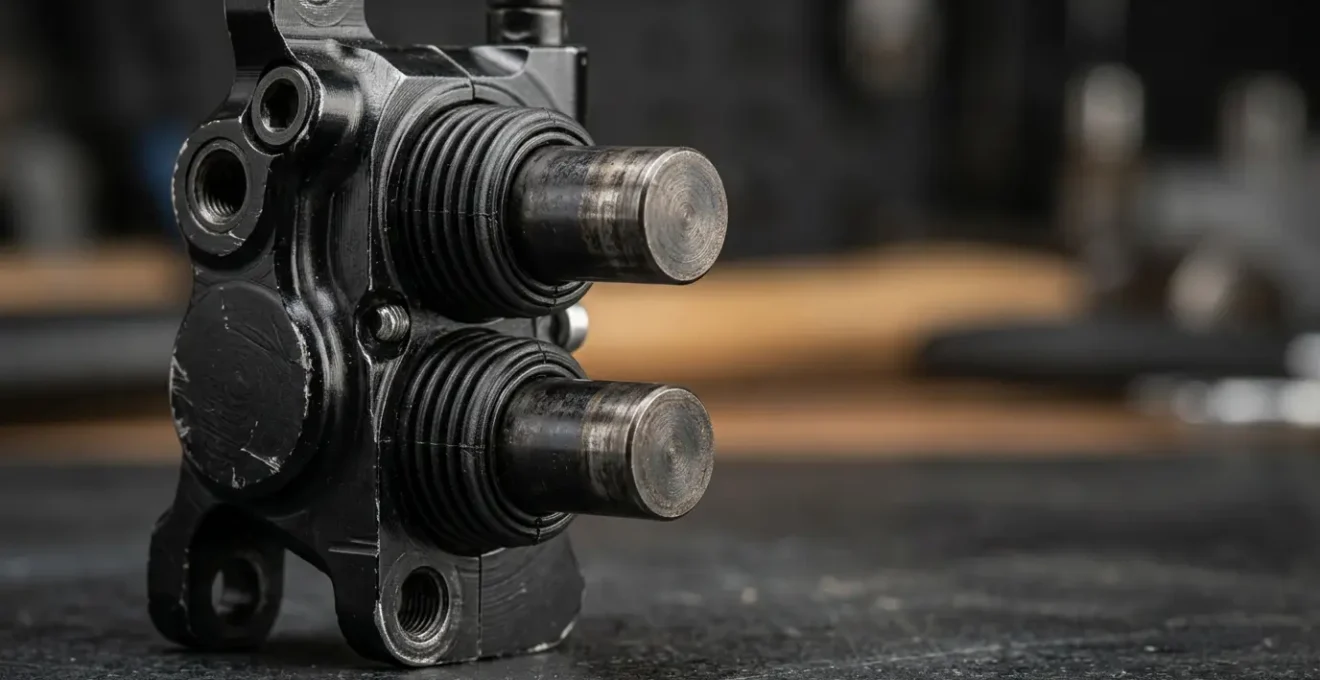
The primary suspect for uneven pad wear is a seized or « lazy » piston. In a healthy caliper, both pistons advance and retract equally. When one becomes sticky, it fails to retract fully, causing its corresponding pad to drag constantly on the rotor. The other, free-moving piston does all the work during braking, leading to imbalanced forces and rapid wear on one side. The cause is rarely a lack of lubrication; it’s almost always contamination or seal degradation. Dirt and brake dust build up on the exposed piston, working their way past the outer dust seal and compromising the main square-edged seal responsible for retraction.
The goal is to mobilize the stuck piston and clean the contamination without damaging the seals. You should never lubricate pistons with external greases or oils. The brake fluid itself is the system’s lubricant. As SRAM’s technical team notes, the fluid’s properties are designed to manage the friction between the piston and the square seal. Adding foreign substances can cause seals to swell and fail. The correct procedure involves cleaning and using the system’s own hydraulic pressure to work the piston free.
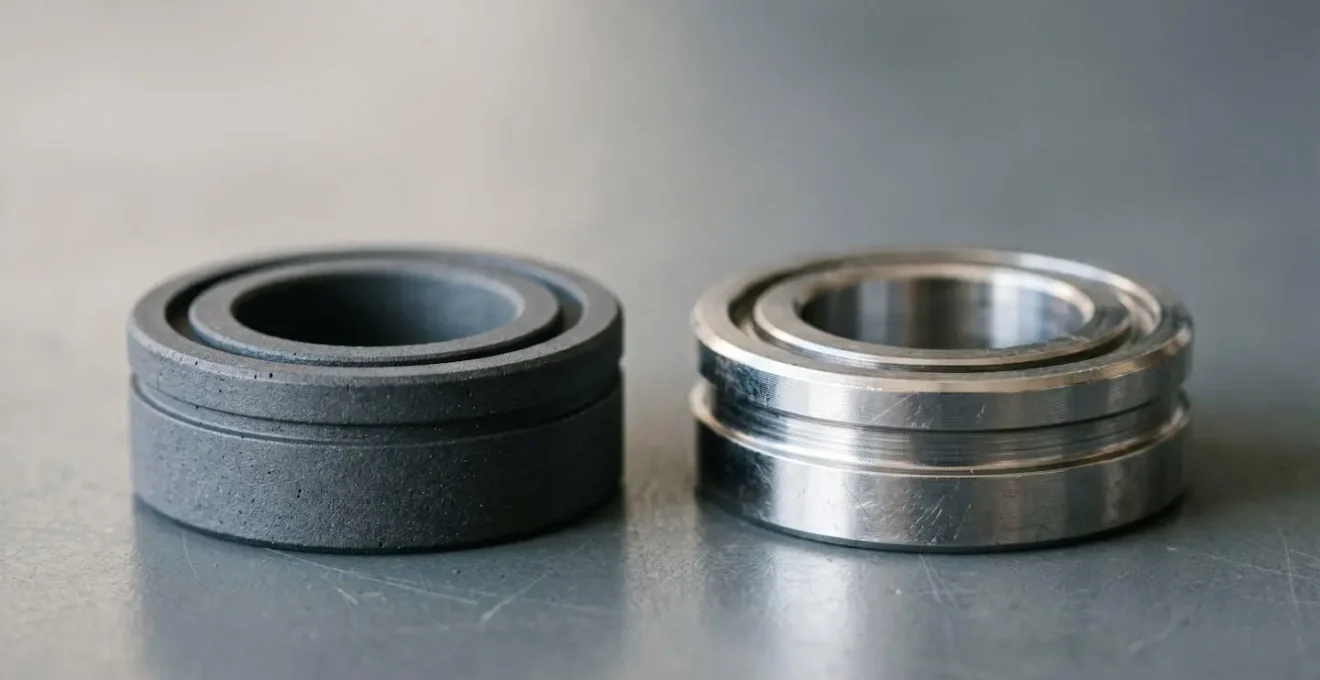
Different piston materials, like the phenolic/ceramic and steel pistons shown above, have different surface properties but are equally susceptible to contamination. The process involves removing the pads, carefully cleaning the exposed piston sides with isopropyl alcohol and a lint-free tool (like a cotton bud), and then using a lever to isolate and move the stuck piston. By blocking the free-moving piston, you direct all hydraulic force to the problematic one, gently encouraging it to move. This process often needs to be repeated to restore smooth, even function.
Fluid Weeping: Is That dampness Around the Caliper Dangerous?
A slight, persistent dampness around the caliper body or lever banjo bolt is a phenomenon known as « fluid weeping. » It’s not a full-blown leak with dripping fluid, but it’s a critical diagnostic indicator that should never be ignored. This weeping is a sign that a seal is beginning to fail or a fitting is not perfectly torqued. As brake fluid is hygroscopic (attracts water) and an excellent solvent, it attracts and holds onto dirt and grime. As noted in expert guides on hydraulic brake maintenance, this means dirt and dust will accumulate precisely where the fluid is weeping, often creating a dark, oily patch that looks like grime but is actually a symptom of a slow leak.
Is it dangerous? Absolutely. While it may not cause an immediate loss of brake pressure, it presents two significant threats. First, it indicates an escape route for fluid, which means it’s also an entry point for air and moisture into the closed system, compromising fluid integrity and lowering its boiling point. Second, and more immediately dangerous, is the risk of pad and rotor contamination. Even a minuscule amount of brake fluid migrating onto the brake pad surface will ruin the pad material, drastically reducing its friction and stopping power. A contaminated pad cannot be salvaged; it must be replaced.
When you see evidence of weeping, your diagnostic path is clear. The first step is to thoroughly clean the entire caliper with isopropyl alcohol and monitor it closely. If the dampness returns, a seal is compromised. This is not a component to repair; it’s a signal that the caliper requires a full rebuild with a new seal kit or, in many cases, complete replacement. Ignoring this subtle warning sign is risking brake failure when you need it most.
Spongy Levers: Why Air Enters the System Even Without Leaks?
You’ve bled your brakes perfectly, yet after a long, demanding descent, the lever feels spongy and pulls to the bar. You check for leaks and find none. The culprit isn’t air that has leaked *in*, but gas that has been created *within* the system. This dangerous phenomenon is known as vapor lock, and it’s caused by old, water-contaminated brake fluid. DOT brake fluids are hygroscopic, meaning they absorb moisture from the atmosphere over time. This water contamination has a catastrophic effect on the fluid’s boiling point.
Under the intense heat generated during heavy braking, this water-logged fluid can boil. When a liquid turns into a gas (vapor), it is far more compressible than a liquid. This newly formed gas bubble in your brake line acts just like a bubble of air, leading to a spongy lever and a terrifying loss of braking power. As the BikeRadar Technical Team explains, « Old, water-contaminated DOT fluid has a lower boiling point. On long descents, the fluid can boil, creating gas bubbles (vapor) that feel identical to air in the system. » This is a critical distinction, as no amount of bleeding will fix the problem if you are refilling with the same old, contaminated fluid.
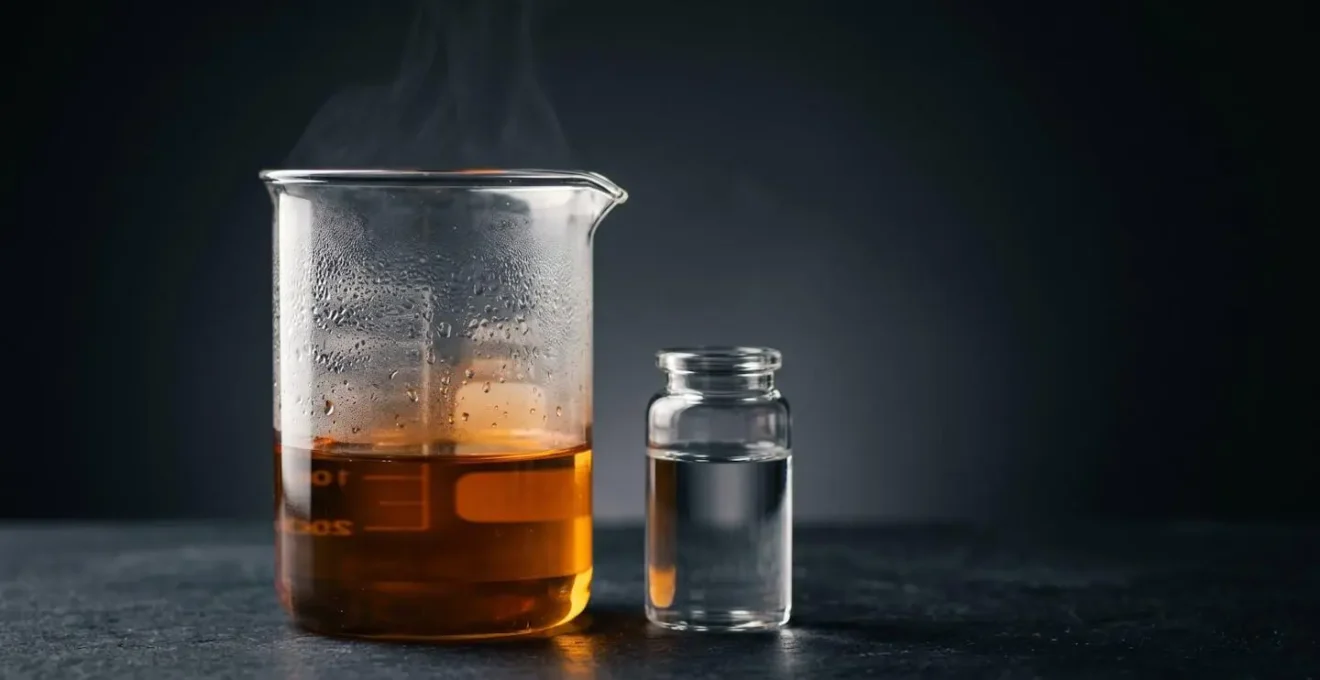
The science is stark: research demonstrates that when brake fluid reaches 8% water content, its boiling point can plummet to around 100°C—the boiling point of water itself, far below the 200°C+ of fresh fluid. A spongy lever, especially one that appears after heavy use, is a definitive signal that your fluid is past its service life. The only solution is a full fluid flush, replacing the old, wet fluid with fresh, new brake fluid from a sealed container.
Centering the Caliper: Why Loosening Bolts Isn’t Always the Fix?
The « loosen, squeeze, tighten » method of caliper centering is the most frequently recommended fix for brake rub, but it’s often misapplied. This procedure only works if the problem is genuinely caliper misalignment. If the root cause is a sticky piston, as discussed earlier, re-centering the caliper is futile. The caliper will align itself to the rotor based on the position of the pistons *at that moment*. If one piston is over-extended, the caliper will center itself in a skewed position. When you ride, the piston will remain stuck, and the rub will persist. This is a classic case of treating a symptom, not the cause.
A true diagnostic approach, as demonstrated in Park Tool technical guides, is to first differentiate between an alignment issue, a piston issue, and a rotor issue. You must first ensure your rotor is true. A wobbly or warped rotor will cause intermittent rubbing that no amount of caliper alignment can fix. Before you touch the caliper bolts, you must verify the rotor’s straightness. A simple, effective method is the zip-tie test, which acts as a rudimentary dial indicator to check for lateral runout.
Only after confirming your rotor is true and your pistons are retracting evenly should you proceed to center the caliper. If you’ve cleaned and mobilized your pistons and the rotor is perfectly straight, but one pad still rubs, then and only then is it a caliper alignment problem. This diagnostic triage saves you from the frustration of endlessly fiddling with bolts when the problem lies deeper within the hydraulic system.
Your 5-Step Rotor & Alignment Sanity Check
- Secure a zip-tie to your fork leg or frame stay so the tip is just barely clearing the rotor’s braking surface.
- Spin the wheel slowly and watch the gap between the zip-tie and rotor. Consistent rubbing points to caliper misalignment.
- An intermittent ‘tick… tick… tick’ as the rotor passes the zip-tie indicates a warped rotor (lateral runout), not an alignment issue.
- If the rotor is warped more than 0.2mm, it needs to be trued with a rotor truing tool before proceeding.
- If the rotor is true but rub persists after cleaning pistons, the issue is alignment. Now you can loosen the bolts and center the caliper.
DOT vs Mineral Oil: Why Mixing Them Destroys Your Seals Instantly?
In the world of hydraulic brakes, there is one unforgivable sin: mixing or using the wrong type of fluid. Brakes are designed to work exclusively with either DOT fluid (DOT 3, 4, or 5.1) or Mineral Oil. There is no crossover. This isn’t a matter of brand preference; it’s a fundamental issue of chemical compatibility. Using the wrong fluid is a guaranteed way to cause catastrophic and irreversible damage to your entire brake system.
The reason lies in the rubber seals inside the master cylinder and caliper. These seals are the heart of the system, responsible for maintaining pressure and retracting the pistons. The choice of rubber compound is entirely dependent on the fluid. As brake system compatibility research shows, DOT systems use EPDM rubber seals, while mineral oil systems use Nitrile (NBR) seals. These two types of rubber react in opposite ways to the different fluids.
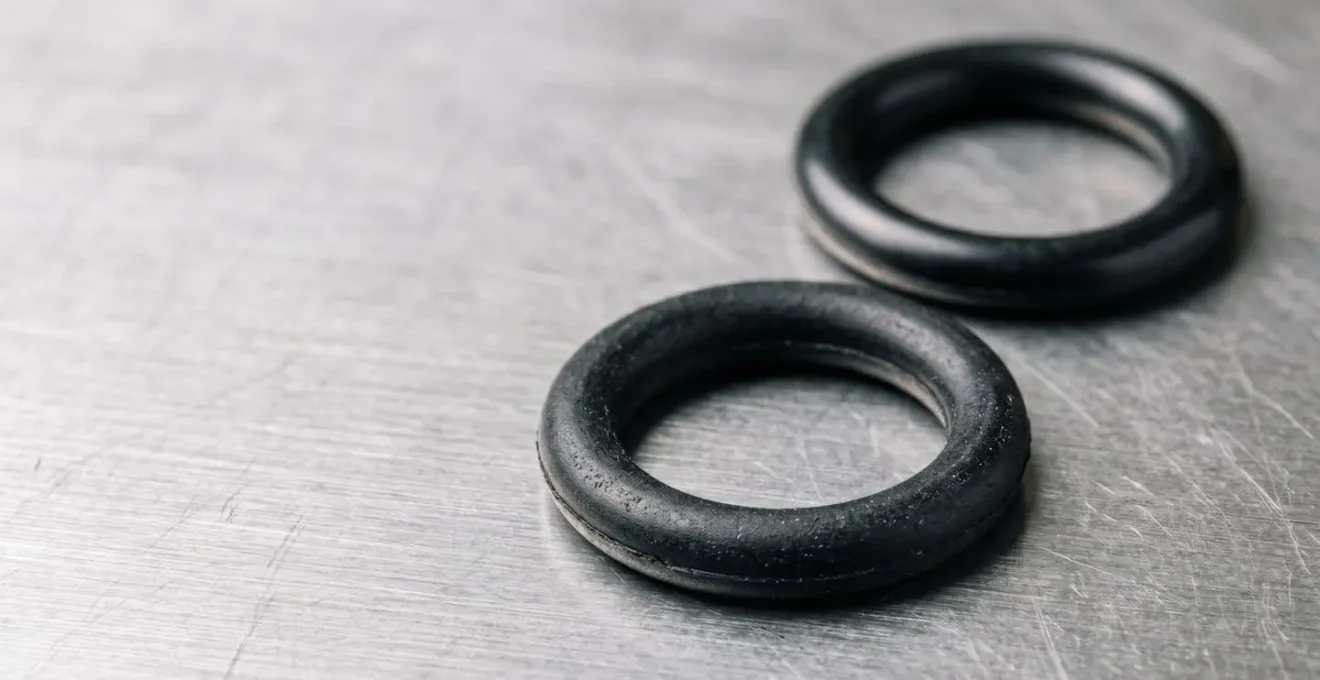
If you put DOT fluid into a mineral oil system, the glycol-based fluid will cause the Nitrile seals to swell up, become soft, and lose their structural integrity. They will jam the pistons and fail to hold pressure. Conversely, if you put mineral oil into a DOT system, the oil will cause the EPDM seals to shrink, harden, and crack. In both cases, the seal integrity is completely destroyed. Once a system is contaminated, there is no going back. The seals are ruined and often swell so much that the pistons cannot even be removed. The only remedy is a complete replacement of every sealed component—levers, calipers, and often the hose itself.
Creak or Click: How to Identify Worn Bushings Without Tools?
You’re chasing a persistent creak or click under braking. You’ve cleaned your pistons, trued your rotor, and centered your caliper, but the noise remains. At this point in your diagnostic triage, it’s time to consider that the noise isn’t coming from the brake itself, but from somewhere else in the chassis that is being stressed by braking forces. The most common culprits are worn suspension pivot bushings, shock eyelet bushings, or a loose headset.
Isolating these noises can be done with a simple process of elimination, using the brake itself as a diagnostic tool. The goal is to lock one part of the bike in place to see if the noise persists when another part moves. This helps you pinpoint the source of the unwanted movement (or « play ») that is causing the creak. A sharp ‘tick’ when you first apply the brake is often just the pads settling in the caliper, which is normal. However, a deeper ‘creak’ or ‘clunk’ suggests a more significant issue.
To perform a brake-induced flex test and isolate these non-brake noises, follow this procedure:
- Stand next to the bike. Firmly apply and hold the rear brake.
- Try to rock the bike forwards and backwards. If you hear or feel a clunk or creak, the noise is coming from the rear suspension pivots or shock mounts, as the wheel is locked but the frame is moving.
- Repeat the test using the front brake. If you hear a noise while rocking the bike, the source is likely a loose headset or, on a full suspension bike, worn fork bushings.
- If a noise is present when riding but disappears entirely when you gently apply a brake, the source is likely not the brake but something resonating that is dampened by the brake application, such as a loose cable housing or even a loose stem.
This systematic approach allows you to confidently rule out the brake as the source of the noise, saving you from needlessly disassembling a perfectly good caliper when the real problem is a worn-out, inexpensive bushing elsewhere on the frame.
Spray Contamination: How One Drop of GT85 Can Ruin Your Braking?
Your brakes, once powerful, now feel weak and howl at the slightest touch. The cause is often invisible: aerosol contamination. A single, mis-aimed spray of a maintenance product like GT85, WD-40, or even some aerosol-based bike polishes can ruin your braking performance. The problem is the atomized mist. When you spray a lubricant near your drivetrain, a fine, invisible cloud of silicone or PTFE-laced oil drifts through the air and inevitably settles on your brake rotor. You won’t see it, but it’s there.
Once this contaminant is on the rotor, it is immediately transferred to your brake pads with the first pull of the lever. The result is a catastrophic loss of friction. The pads, especially organic compounds which are porous like a sponge, absorb the oil. The rotor surface becomes coated in a slick film. The tell-tale sign is a loud, high-pitched squeal or a turkey-like gobble, combined with a significant reduction in stopping power.
Decontaminating the system is a two-part triage process. You must treat the rotor and the pads as separate problems.
- The Rotor: Being a hard, non-porous metal, the rotor is often salvageable. Clean it aggressively with a dedicated disc brake cleaner, then follow up with pure isopropyl alcohol on a clean rag. For stubborn contamination, you can lightly sand the braking surface with fine-grit sandpaper to remove the top layer.
- The Pads: This is the difficult part. Porous organic pads are almost impossible to fully decontaminate once they have absorbed oil. While some attempt to « bake » the contaminants out with a blowtorch or sand the surface, these are last-ditch efforts that rarely restore full power. The most reliable solution for contaminated pads is replacement.
Prevention is the only guaranteed cure. Never use aerosol sprays anywhere near your bike. If you must use a spray lubricant, spray it onto a rag far away from the bike, and then apply it with the rag. This simple discipline will save you the cost and frustration of replacing contaminated brake components.
Key takeaways
- Uneven pad wear is a symptom of a hydraulic imbalance (sticky piston, bad seal), not just an alignment issue.
- A spongy lever without a visible leak is often caused by water-contaminated fluid boiling (vapor lock), requiring a full fluid replacement.
- Isolate noises methodically: use the brakes to immobilize parts of the bike to determine if the sound comes from the brake, headset, or suspension pivots.
Sintered vs Organic Pads: Which Survives Grit Best in the Pennines?
You have performed a full diagnostic. Your pistons are clean, your fluid is fresh, and your caliper is perfectly aligned, yet you still have issues with brake performance or pad life. The final element in the system is the pad compound itself. Choosing between sintered (metallic) and organic (resin) pads is not about which is « better, » but which is right for your specific application and environment. For a rider tackling the gritty, wet conditions typical of the UK’s Pennines, this choice is critical.
Organic pads are made from a mix of fibers and resins. They offer excellent initial bite, especially from cold, are generally quieter, and are kinder to rotors. Sintered pads are made from metallic particles fused under high heat and pressure. They last longer, handle extreme heat better on long descents, and maintain performance in the wet. However, there’s a catch. Real-world testing by publications like Mountain Bike Action reveals a crucial detail for gritty environments: sintered pads, when combined with fine grit and water, can create a « grinding paste » that dramatically accelerates rotor wear. The hard metallic particles in the pad can embed grit, turning the pad into an abrasive sanding block.
While general analysis suggests brake pads last between 500 and 3000 miles, this range is heavily influenced by compound and conditions. In the perpetually damp and gritty conditions of the Pennines, sintered pads may not reach their optimal high operating temperature, reducing their effectiveness, while their hardness contributes to grinding down rotors. Organic pads, while they will wear out faster, provide more consistent modulation and feel in these conditions and are less likely to destroy a rotor with embedded grit. For this specific environment, the shorter life of an organic pad is a worthwhile trade-off for better performance and lower long-term rotor replacement costs.
The following table, based on composite data from maintenance guides, summarizes the performance trade-offs to help you make an informed diagnostic choice.
| Characteristic | Organic (Resin) Pads | Sintered (Metallic) Pads |
|---|---|---|
| Lifespan in Dry Conditions | 500-1500 miles | 1500-3000 miles |
| Cold Weather Performance | Excellent initial bite | Requires heat to reach optimal performance |
| Wet Condition Performance | Superior modulation, consistent | Reduced effectiveness until heated |
| Rotor Wear Rate | Low (rotor-saving choice) | Higher (especially with embedded grit) |
| Noise Level | Quieter operation | Noisier, potential squealing |
| Best Use Case | Wet climates, urban, moderate descents | Dry climates, long descents, high heat |
Adopting this diagnostic, system-wide approach to brake maintenance elevates you from a reactive parts-swapper to a proactive technician. By learning to read the symptoms correctly, you can fix problems permanently, ensure your safety on the trail, and save significant money on parts that were never the problem in the first place. Begin applying this mindset to every aspect of your bike maintenance to achieve true mechanical mastery.