Accessories
Cycling accessories often make the difference between a frustrating ride and an enjoyable one. While your frame and wheels get you moving, it’s the carefully chosen additions—bags, lights, tyres, inflators and measurement tools—that shape how confidently you tackle varied terrain, changing weather and practical challenges like carrying gear or riding after dark.
The accessory market can feel overwhelming, with competing technologies and conflicting advice. This resource cuts through the noise, explaining the core categories of cycling accessories, how they interact with your riding style, and which features genuinely matter versus marketing hype. Whether you’re commuting through urban streets, exploring gravel trails or planning multi-day tours, understanding these fundamentals helps you invest wisely and ride better.
Cargo Solutions: How to Carry Everything You Need
Choosing how to transport tools, food, spare clothes and electronics fundamentally affects both comfort and bike handling. The right storage system disappears into your ride; the wrong one creates constant irritation.
Mounting Positions and Handling Impact
Where you place weight dramatically changes how your bike responds. Handlebar-mounted bags raise the centre of gravity and can create unwanted steering input on rough surfaces, making the front end feel vague on technical descents. Rear seat packs keep weight low and centered, preserving natural handling but limiting quick access. For items you need frequently—snacks, phone, multi-tool—feed bags mounted on the top tube or down tube offer cockpit-accessible storage without affecting steering or sitting position.
Jersey pockets work brilliantly for lightweight essentials on road rides, keeping the bike unencumbered and the load moving with your body. However, for rides exceeding 30 minutes with substantial cargo, transferring weight to the bike frame via a saddlebag reduces back sweat and spinal compression noticeably.
Closure Systems and Weatherproofing Reality
Roll-top closures create more reliable water barriers than zippers, especially during sustained rain. The overlapping fabric and compression straps force water to travel upward against gravity and surface tension—something it rarely manages during typical riding. Standard zippers, even those marketed as « waterproof, » allow seepage at stress points and can corrode tools over time when moisture penetrates.
For maximum packing efficiency, the « burrito roll » method—wrapping tools in a tubular configuration within the bag—eliminates wasted air pockets and prevents items shifting during rough sections. This technique can reduce bag volume requirements by nearly one-third compared to random stuffing.
Mounting Security on Rough Terrain
Bag rattle on gravel or potholed roads stems from inadequate compression or loose mounting systems. Boa-style dial mounts provide micro-adjustable tension that you can fine-tune mid-ride as bags settle, whereas velcro straps often loosen gradually and require stopping to retighten. For saddlebags, choosing narrower profiles prevents the fabric contacting and wearing through shorts during out-of-saddle pedaling—a problem that ruins expensive kit surprisingly quickly.
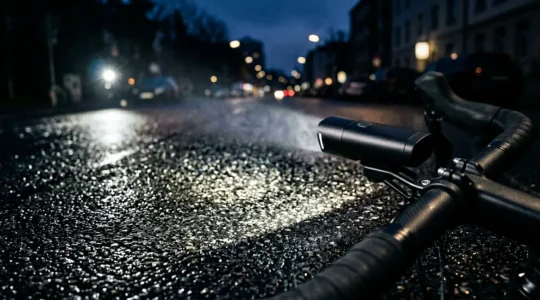
Lighting Systems: Illuminating Your Path Safely
Lumens dominate lighting marketing, but beam pattern, mounting stability and appropriate brightness modes matter far more for practical safety and visibility.
Beam Pattern: Directing Light Where It Counts
A poorly aimed 1000-lumen light creates dangerous glare for oncoming traffic while leaving your actual path dim. The ideal beam concentrates intensity at 10-20 meters ahead, with gradual diffusion to peripheral vision zones. Lights pointing skyward illuminate tree canopies beautifully but fail at revealing potholes, surface debris or wildlife crossing your trajectory.
The « hand test » provides instant feedback: while stationary, position your hand at handlebar height about three meters forward. If the brightest spot hits above wrist level, your beam angle is too high and needs downward adjustment. Most lights allow 5-10 degree tilting via their mounts—small changes create huge improvements.
Mounting Solutions for Stability
Rubber band mounts suit emergency backup lights but lack the rigidity needed for primary illumination on rough roads. Every pothole creates vertical movement that sends your beam dancing across the landscape. Purpose-built clamp mounts or GoPro-style interfaces bolt the light firmly to the handlebar, maintaining consistent aim despite vibration and impacts. This stability proves critical during fast descents when you need predictable illumination to read terrain ahead.
Brightness Modes and Battery Strategy
Maximum brightness modes drain batteries rapidly while generating excessive heat and often unnecessary illumination. Reserve high modes exclusively for steep descents or complex technical sections. For general night riding, medium modes (400-600 lumens) provide ample visibility while extending runtime three to four times compared to maximum settings. Many riders fall into the « high mode trap, » assuming brighter equals safer, then find themselves with dead batteries midway through their route.
Side Visibility and Junction Safety
Being seen from perpendicular angles—at junctions, driveways and crossings—requires side-facing illumination that forward-focused beams don’t provide. Lights with cut-outs or transparent sections on their housings project lateral visibility, making you detectable to drivers emerging from side streets. Adding small clip-on side lights to your frame or helmet creates 360-degree conspicuity that forward-only lights miss entirely.
Tyres: Grip, Protection and Performance
Tyre choice represents one of the highest-impact, lowest-cost upgrades available. Width, tread pattern and casing construction determine how confidently you can ride varied surfaces and how often you fix punctures.
Width and Urban Durability
For city riding mixing smooth tarmac with deteriorating road edges and occasional potholes, 35mm tyres hit an exceptional sweet spot. They’re wide enough to absorb edge impacts without pinch-flatting, provide sufficient air volume for comfortable compliance, yet remain narrow enough to avoid sluggish acceleration or excessive rolling resistance. Wider rubber also bridges small gaps and cracks rather than dropping into them, reducing the jarring hits that damage wheels and shake loose accessories over time.
Tread Patterns for Mixed Terrain
File tread—subtle, low-profile knobs arranged in continuous lines—rolls fast on hardpack while providing adequate edge grip when trails turn loose. For riders frequently transitioning between pavement commutes and weekend gravel exploration, file tread offers versatility without the droning noise and energy loss of aggressive mud spikes on tarmac.
Mud-specific tyres with tall, widely-spaced knobs excel in soft, churned conditions but feel vague and skittish on rock or hardpack. Unless winter roots and deep mud dominate your riding, choosing moderate, all-purpose tread saves swapping tyres seasonally while maintaining acceptable performance across conditions.
Emergency Inflation: The CO2 Essentials
CO2 inflators provide rapid roadside repair, but several non-obvious characteristics affect their practicality and environmental impact.
Safe Handling and Freeze Prevention
Rapidly expanding gas creates intense cold at the cartridge valve—cold enough to cause freeze burns on fingers in seconds. Always use the inflator’s protective sleeve or wrap the cartridge in fabric before threading it onto the valve. This isn’t optional caution; it’s necessary protection against genuine tissue damage during stressful roadside repairs.
Permeability and Pressure Loss
CO2 molecules are smaller than atmospheric nitrogen and oxygen, allowing them to migrate through rubber significantly faster. A tyre inflated with CO2 will lose 20-40% of its pressure within 24 hours, even without leaks. This isn’t a defect—it’s molecular physics. Always re-inflate with a standard pump once you reach home, treating CO2 as emergency-only, not a primary inflation method.
Partial Cartridge Use and Waste
Once punctured, cartridges cannot be reliably resealed for later use. The « half-full cartridge » concept—saving gas for a second flat—works only with specialized regulators that add complexity and cost. Most riders find carrying one extra cartridge more practical than attempting to portion gas mid-repair.
The convenience of CO2 comes with environmental cost: each cartridge represents single-use metal waste. Recycling programs exist but aren’t universally accessible. Balancing this against the practicality of 30-second inflation versus 10 minutes with a hand pump requires honest assessment of your typical routes, support options and mechanical confidence.
Performance Tracking: Understanding Power Meters
Power meters quantify effort objectively, but measurement methodology affects both accuracy and budget significantly.
Left-only power measurement assumes both legs contribute equally and doubles the left pedal’s output to estimate total power. For most recreational riders, leg imbalance stays within 48-52% distribution, making left-only data accurate enough for tracking fitness trends and pacing long efforts. Competitive athletes or those rehabilitating injuries benefit from dual-sided measurement’s precision, which reveals asymmetries worth correcting. However, dual systems cost 60-80% more—investment justified only if you’ll actively use the additional data granularity.
Power meters shine during interval training, long climbs and pacing strategies where perceived effort deceives. A rider feeling strong might be unsustainably redlining; another feeling terrible might be producing perfectly acceptable watts for their target. Objective numbers remove guesswork, but interpreting them requires understanding normalized power, intensity factor and training stress score—concepts best learned gradually rather than obsessed over initially.
Weather Protection: Staying Dry on Every Ride
Mudguards transform wet-weather riding from miserable to merely damp, but installation method affects both performance and aesthetics.
Bolt-on mudguards provide superior coverage and stability, attaching at multiple frame points to prevent flex and maintain consistent tire clearance. They’re ideal for dedicated commuter or touring bikes where practicality outweighs racing aesthetics. Clip-on designs suit race or gravel bikes lacking mudguard eyelets, offering quick installation for unexpected rain or removable protection that doesn’t compromise your bike’s lines during dry months. However, clip-ons provide less comprehensive spray blocking and can rattle or shift on aggressive terrain.
For suspension systems, aftermarket mudguards designed specifically for shock stanchions prevent road spray and mud contaminating the critical seals. Whether these genuinely extend seal life remains debated—proper post-ride cleaning matters more—but they do reduce the frequency of deep cleaning sessions and keep your shock looking less thrashed.
Visibility Aids: Making Yourself Seen
When riding in traffic, physical width indicators like flags or spoke-mounted spacers create a tangible presence that encourages wider passing. While research on their effectiveness shows mixed results—driver behavior varies enormously by road type and local culture—many cyclists report subjectively safer passing distances when using these devices. They function psychologically, making the bicycle appear larger and more vehicle-like, which subconsciously prompts drivers to treat it with greater space.
Light-integrated alarms combine visibility with theft deterrence, though their anti-theft effectiveness is limited. Opportunist thieves may be startled by sudden noise and flashing, but determined theft requires proper locks regardless. The dual-function appeal suits minimalist packers who appreciate consolidating accessories, but don’t rely on alarm features as primary security.
Accessories aren’t about accumulating gear—they’re about solving specific challenges your riding presents. Start with the fundamentals: reliable lighting for when you ride after dark, appropriate tyres for your typical surfaces, and enough cargo capacity for tools and essentials. Build from there based on actual needs discovered through experience, not hypothetical scenarios or marketing pressure. The best accessory setup is the one you barely notice because it works seamlessly with how you actually ride.
StVZO Compliance: Are German Light Standards the Secret to Safer UK Roads?
Effective night cycling isn’t about the brightest light, but the most controlled beam. German StVZO standards prioritise a sharp, anti-dazzle cut-off, illuminating the road ahead without blinding oncoming traffic. While…
Lire la suite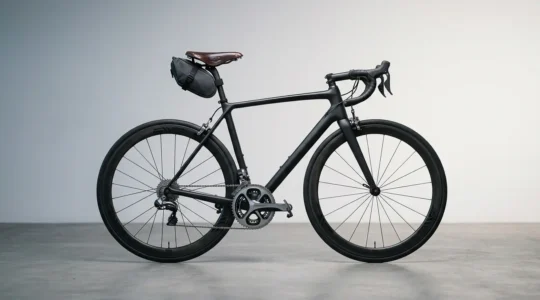
Saddlebag Aesthetics: How to Carry Spares Without Ruining Your Bike’s Lines?
The ultimate solution to carrying spares is not finding the smallest bag, but mastering a system of stability, ergonomics, and compression that makes your storage solution an integrated part of…
Lire la suite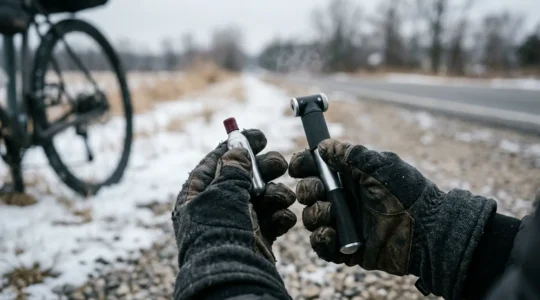
CO2 vs Mini Pump: Which Is More Reliable When Frozen Hands Fail?
CO2 inflators are not a reliable primary tool for winter cycling; they are a high-risk, single-use gamble where failure is the most likely outcome. In freezing conditions, CO2 cartridges cause…
Lire la suite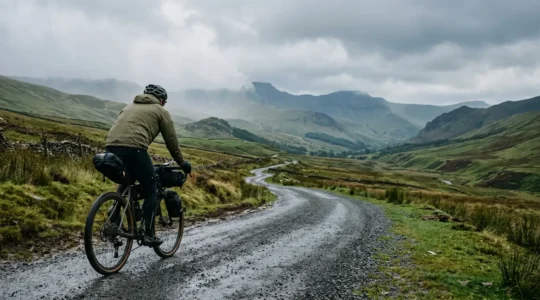
Panniers vs Bikepacking Bags: What Works Best for a Wet Weekend in Wales?
Success on a wet UK tour isn’t about choosing panniers or bikepacking bags; it’s about building a complete system to prevent catastrophic failure from moisture and instability. Handling is paramount:…
Lire la suite
Hub vs Mid-Drive Motors: Which Conquers Steep British Hills Better?
For conquering severe UK gradients, a mid-drive motor with a high-quality torque sensor is non-negotiable; the debate is less about hub vs. mid-drive and more about mastering system dynamics. High…
Lire la suite