
Effective layering for cyclists isn’t about the fabric type alone, but about actively managing your personal ‘micro-climate’ as a complete system.
- Merino wool excels at managing moisture vapour by absorbing it into the fibre core, releasing heat in the process and preventing the « post-climb chill ».
- Synthetics move liquid sweat away from the skin faster, but this rapid evaporation can cause excessive cooling on descents or during low-effort periods.
Recommendation: For variable conditions, a merino or merino-blend base layer provides superior thermal regulation. Master mechanical venting (zips, cuffs) to fine-tune your comfort mid-ride.
Every cyclist who’s ridden through the shifting conditions of a British spring or autumn knows the dilemma. You’re boiling hot on a steep climb, sweat soaking your base layer. Then, at the summit, the wind hits. Within minutes, you’re shivering on the descent, the damp fabric clinging to your skin, stealing precious warmth. This is the classic thermal penalty of getting your clothing system wrong. For years, the conventional wisdom has been to « layer up » and, above all, to « avoid cotton ». This is sound advice, but it barely scratches the surface of the challenge.
The debate often simplifies to a binary choice: merino wool or synthetic polyester. Both have their advocates, and both have their place. But to truly conquer the 10°C temperature swings common on a single ride, you must stop thinking about individual garments and start acting like a textile performance consultant for your own body. The real question isn’t just « Merino or Synthetic? » but rather, « How do I build a dynamic system that maintains my thermal equilibrium? »
The key is to understand and manage your personal micro-climate: the thin layer of air and moisture between your skin and your base layer. This is where the battle for comfort is won or lost. This guide will deconstruct the science behind wicking, insulation, and breathability, not as abstract concepts, but as practical tools. We will explore why your body’s heat engine reacts differently to various fabrics and how modular pieces like arm warmers and gilets are not just accessories, but critical thermostats for your micro-climate system.
To navigate this complex topic, we’ve structured this guide to build your expertise from the fabric fibres outwards. The following sections break down every component of your layering strategy, giving you the knowledge to dress not just for the weather you start in, but for all the weather you’ll encounter along the way.
Table of Contents: Mastering Your Cycling Micro-Climate
- Wicking Speed: Why Your Cotton T-Shirt Is Giving You a Chill on Descents?
- The 3-Layer System: How to Adjust for Wind Chill Without Overheating?
- Skull Caps: Why Covering Your Ears Keeps Your Core Warmer?
- Arm Warmers and Vests: How to Adapt Kit Mid-Ride as the Sun Sets?
- Dehydration in Winter: Why Sweating Under Too Many Layers Is Dangerous?
- The « Boil in the Bag » Effect: How to Avoid Overheating in Rain Jackets?
- The « Flow State »: How Solo Riding Reduces Anxiety Better Than Meditation?
- Waterproof vs Water-Resistant Jackets: What Actually Works in a Downpour?
Wicking Speed: Why Your Cotton T-Shirt Is Giving You a Chill on Descents?
The infamous post-climb chill begins with a simple process: evaporative cooling. When you sweat, your body is using moisture to transfer heat away. This works perfectly until you stop producing massive amounts of heat, like at the top of a climb. If your base layer is saturated, the wind on the descent rapidly accelerates this evaporation, turning your cooling system into a refrigeration unit. This is why cotton is disastrous; it absorbs huge amounts of moisture and holds it against your skin. But the story is more nuanced when comparing performance fabrics. It’s not just about moving moisture, but how it’s managed. A pure synthetic (polyester) base layer is hydrophobic; it doesn’t absorb water but rather moves liquid sweat quickly across its surface to the next layer. This is great for high-intensity, stable conditions. However, merino wool works differently and, in variable conditions, more effectively.
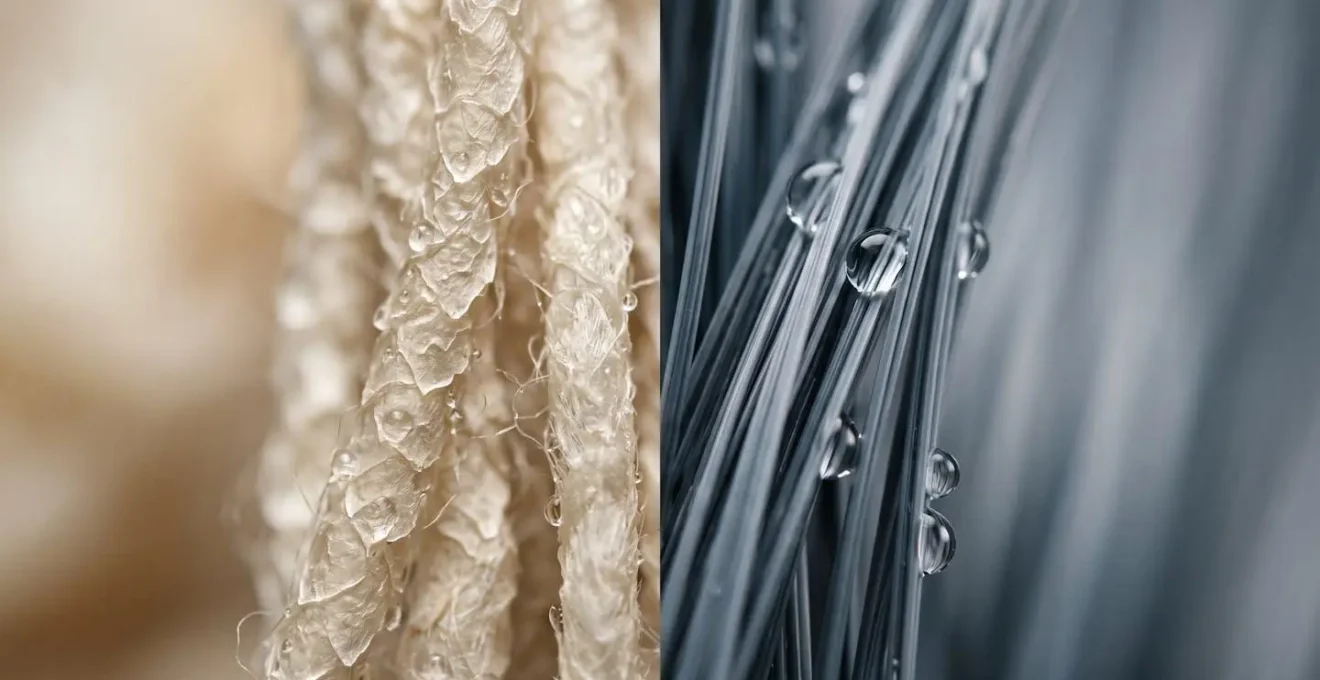
Merino fibres are hydrophilic on the inside and hydrophobic on the outside. They pull moisture *vapour* directly from your skin’s micro-climate, before it even condenses into liquid sweat, and trap it within the core of the fibre. As the PEARL iZUMi Research Team explains, this process creates a tangible benefit: « When that happens, we believe, and other studies seem to indicate, heat is released and that heat travels back through the base layer to keep you warm. It’s the opposite effect of full-polyester systems, which move moisture so rapidly that the body cools in an evaporative process. » This unique mechanism means Merino can keep you feeling dry and prevent the drastic temperature drop synthetics can cause. In fact, research conducted by PEARL iZUMi and The Woolmark Company found that a merino-synthetic hybrid fabric kept cyclists’ skin temperature about 5 degrees Fahrenheit warmer and much drier during a simulated climb and descent protocol compared to a 100% polyester counterpart.
The 3-Layer System: How to Adjust for Wind Chill Without Overheating?
The classic three-layer system—base layer for moisture, mid-layer for insulation, and outer shell for protection—is a valid starting point, but it’s a static model for a dynamic problem. For a cyclist, whose effort and speed change constantly, thinking in terms of a modular « micro-climate control system » is far more effective. Your base layer manages moisture at the skin, while accessories like a gilet (vest) and arm warmers act as your primary thermostats, allowing you to react instantly to changes in temperature and effort.
A windproof gilet is perhaps the single most versatile piece of kit. It protects your core—where your vital organs reside—from wind chill, the primary cause of rapid cooling. Yet, by leaving your arms exposed and often featuring a mesh back, it allows the massive amount of heat generated by your « engine » to escape, preventing overheating. You can un-zip it on climbs and zip it up for descents, making micro-adjustments without stopping. This principle of zonal insulation is key to maintaining thermal equilibrium. The goal is not to be universally « warm, » but to be « comfortable at high intensity, » which often means starting a ride feeling slightly cold.
If you can nail your layering or clothing system, you should not automatically suffer a drop in performance during higher intensity efforts, however, oftentimes that means you will be dressed significantly colder than what you think is comfortable. That’s because if you’re comfortable at low intensity, as soon as intensity increases your core temperature will increase and go higher than it would (with less clothing).
– Rob Pickels, Velo Magazine – How to Layer for Cold Weather Cycling
This counter-intuitive advice is the hallmark of an experienced cyclist. You are dressing for the effort, not for the café stop. By starting cool, you give your body’s heat engine headroom to work without immediately overwhelming your clothing system’s ability to vent moisture and heat. It’s a proactive, not reactive, approach to comfort.
Skull Caps: Why Covering Your Ears Keeps Your Core Warmer?
You’ve likely heard the old myth that you lose most of your body heat through your head. While an oversimplification (you lose heat from any exposed skin), there’s a critical thermoregulatory truth behind why covering your head and especially your ears is so effective. It’s less about the sheer volume of heat loss and more about your body’s command-and-control response to cold. Your ears, nose, and cheeks are packed with thermal sensors. When these sensitive peripheral areas are exposed to significant cold and wind, they send powerful alarm signals to your brain’s hypothalamus, the body’s thermostat.
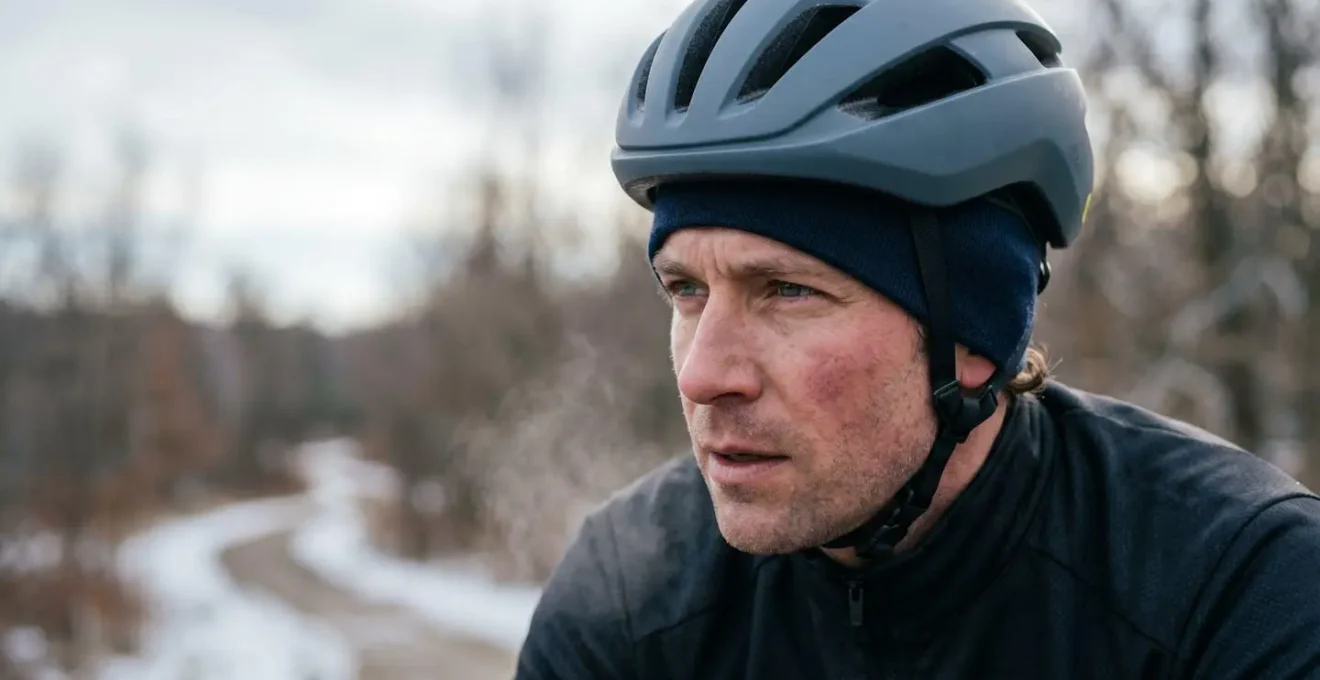
This triggers a systemic response called peripheral vasoconstriction. Your body, trying to protect its core temperature, dramatically reduces blood flow to the skin and extremities (your hands and feet). While this is a smart survival mechanism, it’s what makes you *feel* miserably cold all over, even if your core is still warm. The research on human thermoregulation shows that when the local temperature of the skin drops, blood vessels constrict to reduce heat loss. By simply covering your ears and forehead with a thin skull cap, you insulate these key sensors from the wind chill. This small action prevents the « cold panic » signal from being sent. Your brain doesn’t trigger the drastic vasoconstriction response, allowing warm blood to continue flowing more freely to your hands and feet, keeping them warmer and improving your overall feeling of comfort. It’s a tiny piece of fabric with a disproportionately large impact on your entire system’s thermal equilibrium.
Arm Warmers and Vests: How to Adapt Kit Mid-Ride as the Sun Sets?
Arm warmers and gilets are the primary control dials for your micro-climate. They allow for a level of rapid, dynamic temperature adjustment that a long-sleeve jersey or jacket simply cannot offer. The reason they are so effective lies in the physiology of thermoregulation. Your arms, like your legs, have a large surface area and act as powerful ‘radiators’ for your body. During a hard climb, your body shunts warm blood to the surface of your skin, especially on your limbs, to dissipate heat. Removing or rolling down arm warmers leverages this natural cooling system to its fullest.
This concept of zonal cooling and insulation is supported by detailed physiological research. Studies on cutaneous vasodilation demonstrate that the limbs are primary sites for heat dissipation. By covering the core with a windproof gilet to protect vital organs but leaving the arms free (or covered by easily removable warmers), you create the most efficient system possible. You insulate what needs to be kept warm and allow your most effective radiators to do their job when you’re generating heat. As the sun sets or you face a long, cold descent, the process is reversed. Sliding arm warmers back up takes seconds and immediately traps a layer of insulating air, drastically reducing heat loss from these high-surface-area limbs.
The techniques for using arm warmers are nuanced and allow for fine-tuning your temperature as conditions change. The choice between rolling them down or removing them completely depends on the expected temperature change and effort. This table breaks down the strategic options:
| Technique | Temperature Range | Advantages | Disadvantages | Best Use Case |
|---|---|---|---|---|
| Rolling to Wrists | 12-15°C (54-59°F) | Creates air-trapping gasket; quick adjustment; no storage needed; maintains arm coverage for sun/wind | Limited cooling; fabric bunching can restrict circulation | Moderate climbs where full removal would cause overcooling on descent |
| Rolling to Forearms | 13-16°C (55-61°F) | Exposes high-surface-area forearm skin; maintains elbow warmth; still quick to deploy | Exposed skin vulnerable to wind chill; requires jersey pocket space if fully removed later | Sustained tempo efforts with gradual temperature increase |
| Complete Removal | Above 16°C (61°F) | Maximum heat dissipation; eliminates constriction; reduces weight | Requires storage (jersey pocket); time-consuming to remove/reapply; arms exposed to sun/debris | Long climbs or extended periods above comfort threshold; race situations where marginal watts matter |
Dehydration in Winter: Why Sweating Under Too Many Layers Is Dangerous?
One of the most dangerous and counter-intuitive aspects of cold-weather cycling is the risk of dehydration. When you over-layer, your body works hard to cool itself, producing a significant amount of sweat that gets trapped within your clothing system. You may not feel as thirsty as you do on a hot summer day, and this is where the danger lies. Your body’s own signalling is misleading you. Cold exposure itself blunts your perception of thirst; in fact, research published in Medicine and Science in Sports and Exercise found that cold can cause up to a 40 percent reduction in thirst drive, even when you are already dehydrated.
This is compounded by a physiological response called « cold-induced diuresis. » The cold causes blood vessels in your extremities to constrict, increasing blood pressure in your core. Your body interprets this as being over-hydrated and signals your kidneys to produce more urine to compensate. So, you’re losing more fluid through urination, losing fluid through respiration into the cold, dry air, and losing fluid through sweat under your layers—all while your brain is telling you that you’re not thirsty.
The performance impact is significant and occurs long before you feel it. A landmark study on cyclists demonstrated this effect with brutal clarity. Even a mild dehydration of 2.2% of body mass significantly decreased 5km time trial performance and impaired the body’s ability to thermoregulate. The most alarming finding was that this happened even when the cyclists’ perceived thirst was identical to a fully hydrated group, proving that relying on thirst is an unreliable strategy. When you sweat excessively under too many layers, you are not just getting damp and uncomfortable; you are actively depleting your body’s fluid reserves, compromising your performance, and setting yourself up for a much more severe cold-related emergency if something goes wrong.
The « Boil in the Bag » Effect: How to Avoid Overheating in Rain Jackets?
A high-quality waterproof jacket is a marvel of materials science, but it’s also governed by the unyielding laws of physics. The « boil in the bag » effect happens when your body’s rate of sweat production exceeds your jacket’s ability to transport that moisture vapour to the outside. Even the most advanced membranes have their limits. The technical analysis of breathability ratings reveals that while a top-tier jacket might have a Moisture Vapour Transmission Rate (MVTR) of 20,000 g/m²/24h, a cyclist working hard can produce sweat at a rate exceeding 1,000 g/m²/hr, which would equate to over 24,000 g/m²/24h. The maths is simple: you are producing moisture faster than the fabric can possibly vent it.
When this happens, the micro-climate inside your jacket reaches 100% humidity. No more sweat can evaporate from your skin, so your body’s primary cooling mechanism shuts down. Your core temperature rises, and liquid sweat builds up on the inside of the jacket, leaving you soaked from the inside out. The solution is not to find a mythical jacket that defies physics, but to master the art of mechanical venting. This means using your jacket’s features—zips, cuffs, and vents—as an active cooling system to manually dump heat and moisture before it overwhelms the fabric’s breathability.
Anticipation is key. You must vent *before* you get too hot. Waiting until you’re overheating is too late; the moisture has already built up. By strategically using your jacket’s zippers, you can create airflow that works in concert with the fabric’s properties, maintaining a functional micro-climate even in the rain.
Your Action Plan: Escaping the ‘Boil in the Bag’ Trap
- Pre-Climb Venting: Unzip your main zipper 15-20cm and open any pit-zips fully 2-3 minutes before starting a sustained climb. This establishes airflow before your core temperature spikes.
- Two-Way Zipper Technique: If your jacket has a two-way zip, use the bottom pull to create a 10-15cm opening at your waist. This allows heat to dump from your core without exposing your chest directly to rain and wind.
- Cuff Management: Push or roll your jacket cuffs up to your mid-forearm during hard efforts. Your forearms are a high-surface-area zone for heat dissipation, and it’s a quick way to introduce cooling air into the system.
- Back Vent Activation: If the jacket has a rear vent flap, ensure the jersey underneath is unzipped to create a « chimney effect, » helping to draw warm, moist air up and out.
- Descent Protocol: Re-close all vents 30-60 seconds before you crest a climb. This traps a layer of warm air and allows residual body heat to continue venting while preparing your shell for the increased wind chill of the descent.
The « Flow State »: How Solo Riding Reduces Anxiety Better Than Meditation?
The profound mental benefits of solo riding—the clarity, the stress reduction, the feeling of « flow »—are not just poetic fancy. They are deeply tied to a state of complete mental immersion, which is surprisingly dependent on physical comfort. When your body is under thermal stress, whether from being too cold or battling the « boil in the bag » effect, it creates a constant, low-level stream of distracting physical sensations. This « thermal distraction » places a measurable cognitive load on your brain. A part of your conscious mind is always occupied with the discomfort, preventing you from fully sinking into the meditative rhythm of the ride.
Achieving thermal neutrality is therefore a gateway to psychological performance. As research shows, when the body is thermally stressed, the Rate of Perceived Exertion (RPE) increases for the same power output. In other words, when you’re uncomfortably hot or cold, the ride literally *feels* harder. By nailing your layering system to maintain a stable micro-climate, you lower your RPE, and the ride feels easier and more enjoyable. This creates a positive psychological feedback loop. A study on cyclists using infrared thermography found that garments maintaining an optimal skin temperature (32-34°C) across varying efforts allowed athletes to sustain higher levels of focus. The study concluded that thermal distraction is a direct barrier to entering a flow state.
By eliminating these physical distractions through intelligent layering, you free up cognitive resources. Your mind is no longer fighting a battle on two fronts (physical discomfort and the mental effort of the ride). It can fully immerse itself in the experience: the cadence of your pedals, the landscape scrolling by, the sound of your breathing. This is the foundation of flow state. In this sense, choosing the right base layer and mastering your venting strategy is not just about comfort—it’s a foundational step for unlocking the profound mental health benefits that make cycling so much more than just exercise.
Key takeaways
- Effective cycling comfort comes from managing your ‘micro-climate’ as a system, not just wearing layers.
- In fluctuating conditions, merino or merino-blends offer superior thermal regulation by managing moisture vapour and preventing evaporative chill.
- Mechanical venting—using zips, cuffs, and adaptable items like arm warmers—is your active thermostat for real-time temperature control.
Waterproof vs Water-Resistant Jackets: What Actually Works in a Downpour?
The final piece of the micro-climate puzzle is the outer shell, your shield against wind and rain. The terms « water-resistant » and « waterproof » are often used interchangeably, but for a cyclist in a downpour, the difference is critical. A water-resistant jacket or jersey (like a Gabba-style garment) is treated with a Durable Water Repellent (DWR) finish. This coating causes water to bead up and roll off the surface. It’s highly breathable and perfect for drizzle or short, intense efforts where shedding sweat is more important than blocking every drop. However, in sustained rain, the DWR will wear off and the fabric will « wet out » or saturate.
A true waterproof jacket, on the other hand, features a membrane (like Gore-Tex) with microscopic pores large enough to let water vapour (your sweat) out, but too small for liquid water droplets (rain) to get in. These jackets also have taped or welded seams to prevent water from entering through the stitching. This provides a much higher level of protection, but often at the cost of some breathability. The choice between them is a strategic trade-off between protection and ventilation, dictated entirely by the expected conditions and ride duration.
This matrix provides a clear guide for choosing your protection based on the reality of the ride, accepting that in the worst conditions, the goal shifts from « staying dry » to « staying warm while wet. »
| Rain Intensity | Ride Duration < 90min | Ride Duration 90min-3hr | Ride Duration > 3hr |
|---|---|---|---|
| Drizzle / Light Rain (1-2mm/hr) |
Water-Resistant DWR-treated softshell or Gabba-style garment; breathability priority over waterproofing |
Water-Resistant High-quality DWR with windproof membrane (e.g., Gore WindStopper) |
Waterproof Recommended Prolonged exposure will saturate DWR; 10,000mm+ membrane advised |
| Steady Rain (2-5mm/hr) |
Water-Resistant (High-End) Premium DWR + pit-zips essential; acceptable for tempo/race efforts |
Waterproof 15,000mm+ rated membrane with excellent breathability (RET < 6) |
Waterproof (Mandatory) Gore-Tex or equivalent; DWR maintenance critical |
| Downpour (> 5mm/hr) |
Waterproof 20,000mm+ with taped seams; accept reduced breathability |
Waterproof + Strategy Focus shifts to staying warm when wet; merino base layer becomes critical survival layer |
Waterproof + Survival Mindset Water ingress inevitable at cuffs/neck; warmth-when-wet materials (merino) non-negotiable |
By shifting your mindset from simply choosing a fabric to actively managing your personal micro-climate, you gain control over your comfort and performance. Apply these principles, test your system, and transform your experience of riding in changeable weather from a battle for survival into a source of strength.