The « waterproof » label on your jacket is often misleading; arriving dry depends more on the fabric’s ability to breathe than its ability to block rain.
- A high waterproof rating (HH) is useless if your jacket can’t expel sweat vapor, leading to the dreaded « boil in the bag » effect.
- Key performance indicators like RET (breathability) and construction details like taped seams are far more critical than brand names alone.
Recommendation: Stop chasing the highest waterproof number and instead, select a jacket based on the right balance of breathability and weather protection for your specific ride intensity and duration.
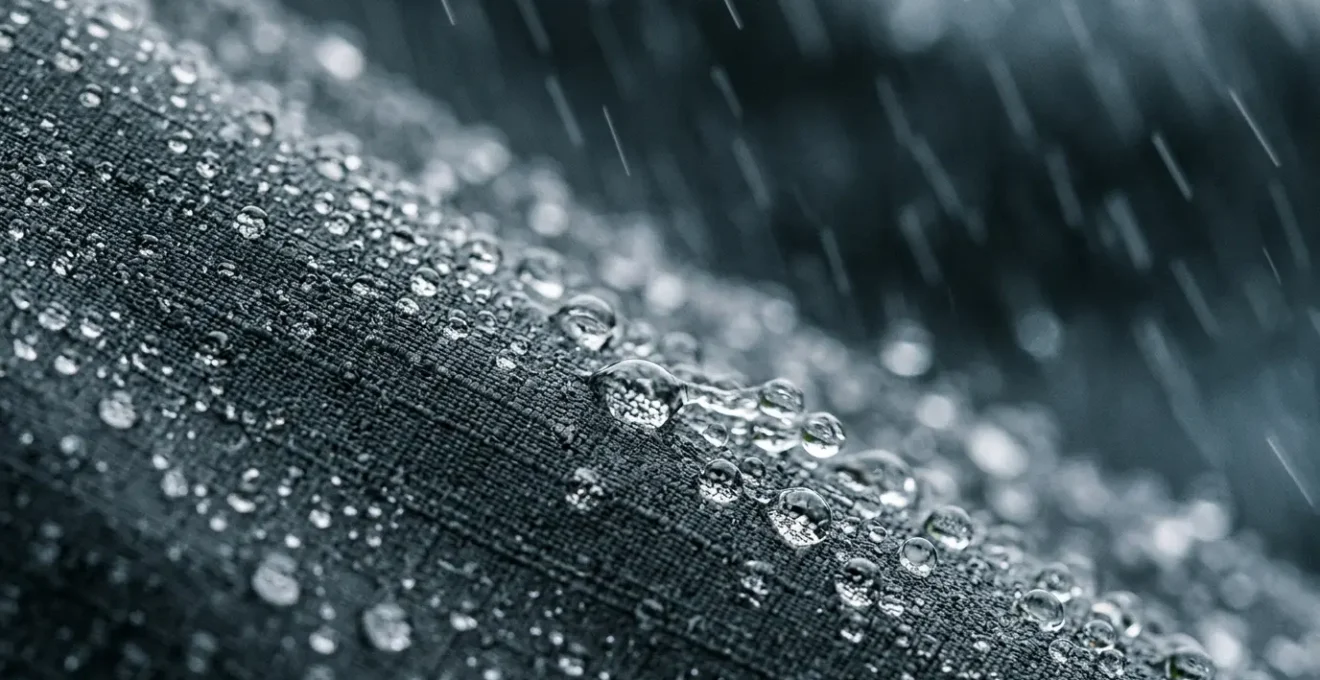
You bought the « waterproof » jacket. It had the impressive-looking tags, the technical-sounding fabric name, and the promise of a dry commute. Yet, halfway to your destination in a steady drizzle, you feel it: that familiar, clammy dampness. You arrive not just wet from the outside, but seemingly from the inside out. This experience is the frustrating reality for countless commuters and cyclists who have invested in gear that, on paper, should have kept them bone dry. The market is flooded with claims of « 10,000mm waterproofing » and proprietary fabric technologies, all vying for your trust.
The common advice is to simply look for a higher waterproof rating or a famous brand name like Gore-Tex. But this oversimplifies a complex engineering problem. The truth is, a cycling rain jacket is not just a shield; it’s a moisture management system. Its job is twofold: to prevent water ingress from rain and to allow moisture egress from your body. Failure in either function results in you getting wet. Most cheap jackets fail spectacularly at the second task, creating a personal sauna effect that soaks you in your own sweat.
This article will debunk the marketing myths from a textile engineering perspective. We will move beyond the superficial ratings to dissect the core principles that truly define a jacket’s performance in a downpour. We will explore the critical trade-offs between waterproofing and breathability, the science behind different membranes, and the mechanical failure points that separate a reliable piece of equipment from a disappointing purchase. By the end, you will have the knowledge not just to buy a better jacket, but to understand precisely why it works.
To navigate this technical landscape, this guide is structured to deconstruct each component of a jacket’s performance, from the core membrane technology to the crucial details of its construction and care.
Summary: Waterproof vs Water-Resistant Jackets: What Actually Works in a Downpour?
- Gore-Tex vs Proprietary Membranes: Is the Brand Name Worth the Extra Cost?
- RET Ratings: How to Tell If a Jacket Will Make You Sweat from Inside?
- Flapping Fabric: Why Race Fit Rain Jackets Save Energy?
- Taped Seams: Why They Are the First Thing to Fail on Cheap Jackets?
- The Shakedry Revolution: Is It Too Fragile for Daily Commuting?
- Spray-on vs Wash-in Re-proofers: Which Is Better for Breathability?
- The « Boil in the Bag » Effect: How to Avoid Overheating in Rain Jackets?
- How to Wash Technical Cycling Kit Without Ruining the DWR Coating?
Gore-Tex vs Proprietary Membranes: Is the Brand Name Worth the Extra Cost?
The name Gore-Tex has become almost synonymous with « waterproof, » but from an engineering standpoint, it’s simply a specific solution to a materials science problem. Gore-Tex membranes are made from expanded polytetrafluoroethylene (ePTFE), a material stretched to create a microporous structure. These pores are about 20,000 times smaller than a water droplet, blocking rain, but 700 times larger than a water vapor molecule, allowing sweat to escape. This is the fundamental principle of a waterproof-breathable fabric.
However, many brands have developed their own proprietary membranes, often using a different technology: hydrophilic polyurethane (PU). Instead of physical pores, these solid PU membranes work on a molecular level. Water vapor from your sweat is absorbed into the hydrophilic inner side of the membrane, diffused across it due to a pressure differential (higher humidity inside), and evaporated from the outer surface. This process is effective but generally requires a higher humidity gradient to work efficiently, meaning you might feel slightly damper before the « breathing » process kicks in.
So, is Gore-Tex worth the premium? Part of the cost is brand licensing and a stringent quality control program that manufacturers must adhere to. This guarantees a high standard. However, top-tier proprietary PU membranes can now achieve comparable performance metrics, often at a lower price point. The key is to look at the data, not just the logo.
The table below, sourced from a comparative analysis of membrane technologies, shows how different types stack up. It reveals that while Gore-Tex sets a high bar, advanced alternatives like eVent (another ePTFE) and high-end proprietary fabrics can meet or even exceed its performance in specific areas like breathability.
| Performance Metric | Gore-Tex ePTFE | Proprietary PU Membranes | eVent (ePTFE alternative) |
|---|---|---|---|
| Waterproof Rating (HH) | 28,000mm+ | 15,000-30,000mm | 30,000mm+ |
| Breathability (MVTR) | 15,000-25,000 g/m²/24h | 10,000-20,000 g/m²/24h | 15,000-25,000 g/m²/24h |
| Membrane Type | Microporous (ePTFE) | Hydrophilic (PU) | Microporous (ePTFE) |
| Key Advantage | Brand reputation, quality control standards | Lower cost, brand-specific innovation | Superior breathability, Direct Venting |
| Key Disadvantage | Premium price, vulnerable to oil/sweat | Requires humidity gradient to function | Higher maintenance requirements |
RET Ratings: How to Tell If a Jacket Will Make You Sweat from Inside?
While waterproof ratings (measured in Hydrostatic Head or HH) tell you how much water pressure a fabric can withstand from the outside, they say nothing about its ability to handle moisture from the inside. This is where the RET rating (Resistance to Evaporative Heat Transfer) becomes the single most important metric for a cyclist. RET measures how much resistance a fabric presents to water vapor passing through it. A lower RET value means better breathability. For an active pursuit like cycling, a low RET is non-negotiable to avoid the « boil in the bag » effect.
As the diagram above illustrates, your clothing is a system. Moisture must travel from your skin, through your baselayer, and finally escape through your jacket. If the jacket (the outer layer) has a high resistance (high RET), this entire system breaks down. Vapor condenses on the inside of the jacket, and you get wet from your own sweat, no matter how « waterproof » the fabric is. This is the critical failure that most budget jackets experience.
To put it in practical terms, a jacket’s suitability for cycling can be determined almost entirely by its RET score. According to guidance from technical apparel experts, the scale is clear. As confirmed by Decathlon’s own material testing advice, different levels of activity demand different levels of breathability:
- RET < 6: Extremely breathable. This is what you need for high-intensity cycling, racing, or climbing. It allows maximum sweat vapor to escape, keeping you comfortable even at high effort. Fabrics like Gore-Tex Shakedry can even achieve an incredible RET of less than 3.
- RET 6-12: Very breathable. This is the sweet spot for most commuters, club riders, and all-day touring. It offers a great balance of protection and comfort for moderate-intensity efforts.
- RET 12-20: Moderately breathable. A jacket in this range is only suitable for very low-intensity riding or as a short-term emergency shell. You will likely feel clammy as soon as your heart rate rises.
- RET > 20: Poor breathability. Avoid this for any form of active use. It’s essentially a plastic bag that will trap all moisture.
Flapping Fabric: Why Race Fit Rain Jackets Save Energy?
A rain jacket’s primary role is protection, but for cyclists, its secondary effect on aerodynamics can be significant. The difference between a close-fitting « race fit » jacket and a loose, flapping « commuter fit » jacket is not just about style; it’s about physics. As you ride, you expend most of your energy overcoming aerodynamic drag. Any loose fabric that catches the wind acts like a small parachute, creating turbulence and increasing this drag, forcing you to work harder to maintain the same speed.
This isn’t a marginal gain only relevant to professional racers. The energy penalty is substantial for any rider. For example, Specialized wind tunnel testing revealed that a switch from a standard jersey to an aero-optimized one could save a rider 83 seconds over a 40km distance at 50kph. While a jacket introduces more variables, the principle is the same: excess material costs you energy.
Case Study: The Real-World Speed Cost of a Loose Jacket
To quantify this, GCN conducted a field test comparing rider speed in a tight versus a loose top at different power outputs. At a moderate 200-watt effort—a common power level for many commuters and club riders—the rider was 0.8 km/h faster in the form-fitting clothing. When the effort increased to 400 watts, that advantage grew to 1.8 km/h. This demonstrates that the aerodynamic penalty of loose, flapping fabric scales with your speed and effort. Over the course of a one-hour commute, that seemingly small difference adds up to wasted energy and minutes lost.
For a commuter, this means that a well-fitted jacket not only feels better and prevents cold air from getting trapped but also makes your ride measurably more efficient. It allows you to expend less energy, which in turn means you produce less heat and sweat—further aiding the jacket’s breathability and keeping you more comfortable. The ideal fit is snug enough to not flap in the wind but allows for a baselayer and jersey underneath without compressing them.
Taped Seams: Why They Are the First Thing to Fail on Cheap Jackets?
A waterproof fabric is useless if the jacket is assembled with needles and thread. Every stitch hole in a seam is a potential entry point for water. To counter this, manufacturers apply a waterproof tape over these seams on the inside of the jacket. However, the quality and extent of this seam taping is one of the biggest differentiators between a high-performance jacket and a cheap one that fails in the first real storm. It is a classic point of mechanical failure.
There are two main levels of seam sealing. As the WindRider Technical Analysis points out, the distinction is critical:
Fully taped seams use waterproof tape over every stitch hole. Critically taped seams only seal the primary seams in the body.
– WindRider Technical Analysis, Gore-Tex vs. Proprietary Membranes
« Critically taped » jackets, often found at lower price points, only tape the most exposed seams like the shoulders and back, leaving areas like armholes, pockets, and zippers vulnerable. A « fully taped » or « fully sealed » jacket ensures every single seam is covered. For cycling in persistent rain, fully taped seams are essential. Water driven by wind and motion will find any weakness, and an untaped seam is a guaranteed leak.
Beyond coverage, the quality of the tape and its application is paramount. Cheap tape can be stiff, which creates stress points and can crack or peel away from the fabric after repeated flexing and washing. High-quality tape is pliable and bonded securely without any bubbles or peeling edges, moving with the fabric as you ride. This is often an invisible feature when buying, but it is the detail that determines long-term durability.
Your Pre-Purchase Seam Inspection Checklist
- Expose the Interior: Turn the jacket completely inside out in the store. This is the only way to directly inspect the seam taping.
- Assess Suppleness: Gently bend and flex a taped seam. High-quality tape will feel pliable and move with the fabric. If it feels stiff, plasticky, or rigid, it’s a red flag for premature failure.
- Verify Full Coverage: Trace the seams with your finger. Does the tape cover every single stitch line, including around the pockets, zippers, collar, and under the arms? Anything less than 100% is a compromise.
- Check Application Quality: Look closely at the tape itself. It should be applied smoothly and evenly, with no air bubbles, wrinkles, or signs of adhesive seeping out at the edges. Peeling corners are an immediate deal-breaker.
- Examine High-Stress Zones: Pay special attention to the shoulder and underarm seams. These areas endure the most movement and stress, and the taping here must be flawless.
The Shakedry Revolution: Is It Too Fragile for Daily Commuting?
For a few years, Gore-Tex Shakedry technology represented the pinnacle of waterproof-breathable performance. Its design was revolutionary: it eliminated the outer face fabric entirely, leaving the ePTFE membrane as the external surface. This meant water could never « wet out » the surface, so it beaded and rolled off indefinitely, and its breathability was unmatched, with an RET rating below 3. It was the closest thing to a perfect rain jacket for high-intensity athletes.
However, this incredible performance came with a significant engineering trade-off: durability. The exposed membrane, while miraculously waterproof, was susceptible to abrasion and contamination. Wearing a backpack, for instance, could damage the delicate surface, and body oils could degrade its performance over time. It was a specialist tool for racers, not a rugged workhorse for daily commuters carrying bags.
The Shakedry story serves as a perfect case study in performance versus practicality. As detailed in a report on its discontinuation, Gore ceased production of Shakedry in 2022. This decision was driven partly by supply challenges but also by the brand’s commitment to eliminate environmentally persistent PFCs (perfluorochemicals) from their products. Shakedry’s exposed ePTFE membrane was a PFC-based technology.
In its place, new-generation membranes like Gore’s ePE (expanded polyethylene) and advanced proprietary PU films from competitors are emerging. These new materials aim to find a better balance: offering very high breathability and PFC-free construction while restoring the protective outer face fabric for improved durability. While they may not achieve the absolute « never wets out » performance of Shakedry, they are far better suited to the rigors of daily commuting, where abrasion resistance and longevity are just as important as shedding water.
Spray-on vs Wash-in Re-proofers: Which Is Better for Breathability?
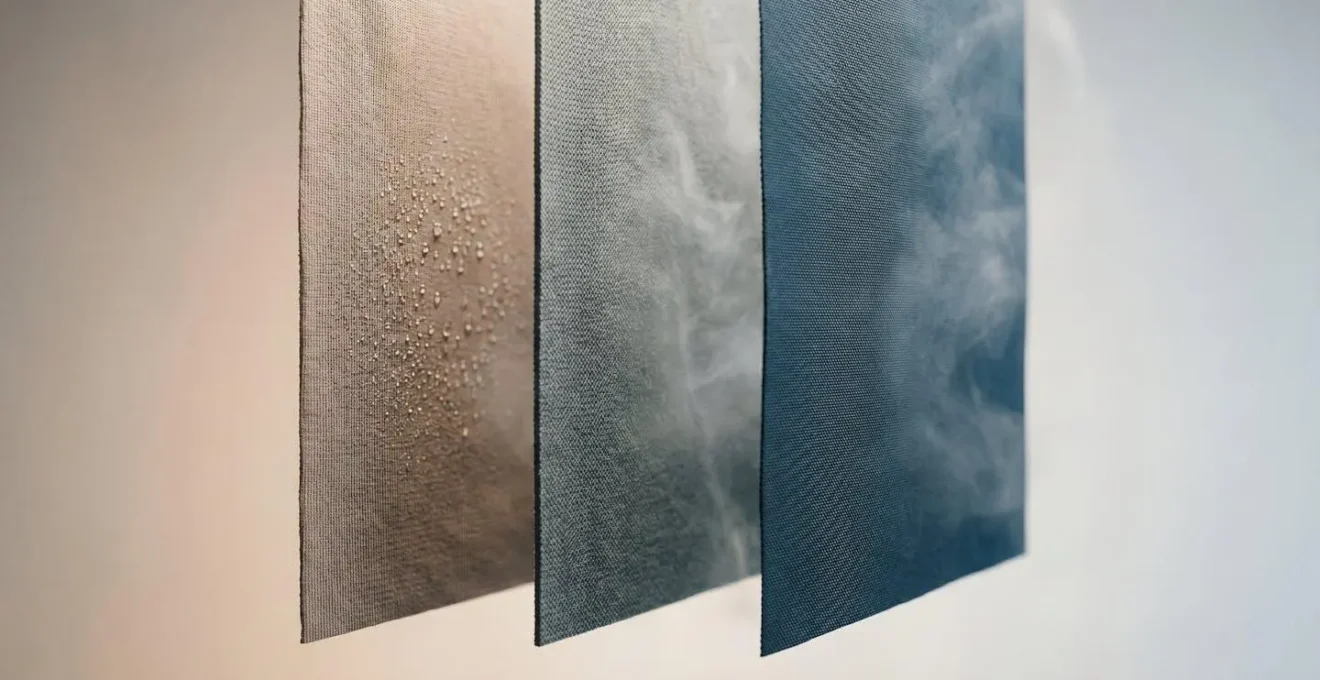
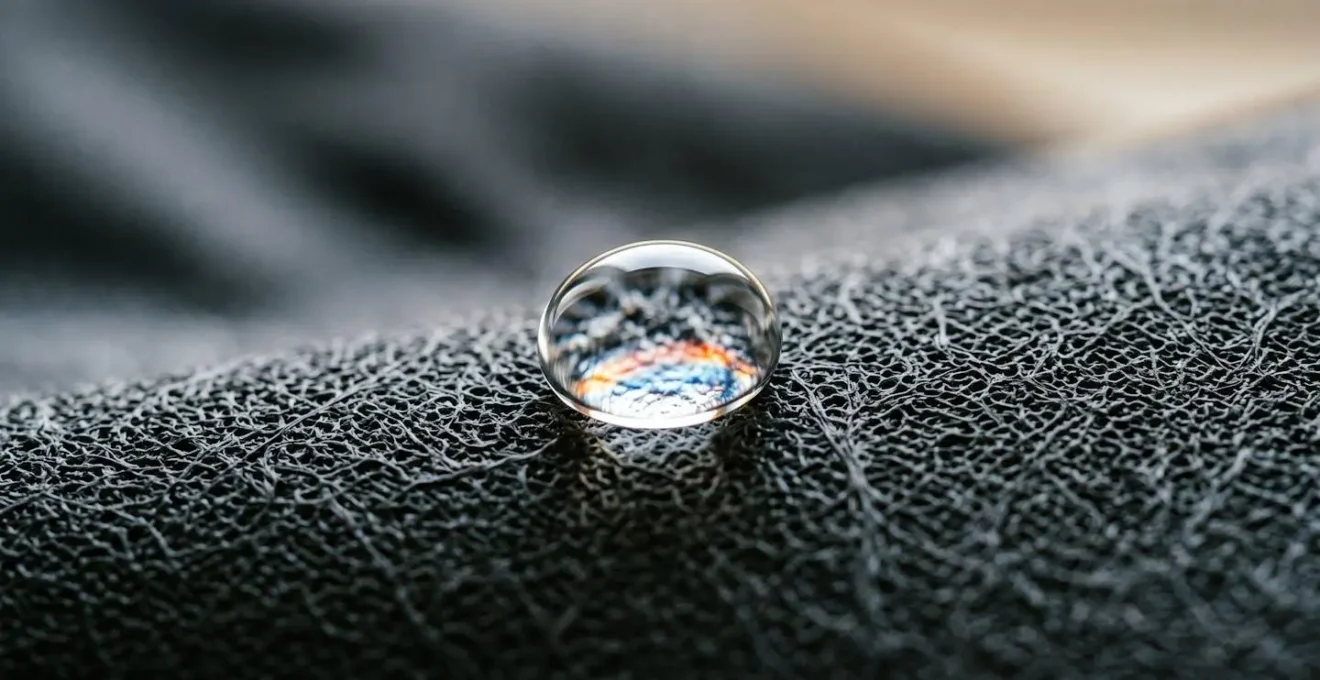
Even the best jackets eventually lose their ability to bead water. The factory-applied Durable Water Repellent (DWR) coating, which sits on the outermost face fabric, wears off due to abrasion, dirt, and washing. When this happens, the face fabric gets saturated with water, a state known as « wetting out. » While the inner membrane may still be waterproof, a wetted-out jacket feels cold, heavy, and critically, its breathability plummets because water vapor can no longer escape through the saturated outer layer.
The solution is to re-apply a DWR treatment, but the method you choose has a significant impact on your jacket’s performance. The two main options are wash-in and spray-on treatments. Wash-in products are convenient, as they treat the entire garment in the washing machine. However, they coat everything—the outer fabric, the inner lining, and the membrane itself. This is a problem. Coating the inside of the jacket with a water-repellent layer inhibits its ability to manage moisture and can clog the very pores or molecular pathways designed for breathability. In fact, some laboratory testing demonstrates that wash-in treatments can reduce a garment’s overall breathability by 25-50%.
Spray-on treatments, by contrast, allow for targeted application. You apply them only to the exterior face fabric, where the DWR is needed. This leaves the internal lining and membrane untouched, preserving the jacket’s entire moisture management system and maximizing its breathability. For any high-performance waterproof-breathable garment, a spray-on re-proofer is almost always the superior choice from an engineering perspective. Before re-proofing, however, you should always wash the jacket and try heat-activating the existing DWR (with a low-heat tumble dry or iron), as often this is all that’s needed to restore performance.
If your jacket is wetting out, follow this logical troubleshooting sequence:
- Step 1: Wash with a technical cleaner. This removes contaminants like dirt and body oils that are masking the DWR and clogging the membrane.
- Step 2: Heat-activate the existing DWR. Tumble dry on a low or medium setting. Often, this is enough to realign the DWR polymers and restore water repellency.
- Step 3 (Only if beading is not restored): Re-apply DWR. Use a spray-on treatment on the clean, damp garment, focusing only on the outer surface.
- Step 4: Heat-activate the new DWR. A final tumble dry is crucial to bond the new treatment to the fabric for maximum effectiveness and durability.
The « Boil in the Bag » Effect: How to Avoid Overheating in Rain Jackets?
The « boil in the bag » effect is the unpleasant, swampy feeling of getting soaked by your own sweat inside a rain jacket. It’s the direct result of your body generating more moisture vapor than the jacket’s fabric can transport to the outside world. This happens when there’s a mismatch between your effort level and the jacket’s breathability (its RET rating). Choosing a jacket is therefore not about finding the « best » one, but the one with the right performance characteristics for your specific use case.
A short, intense ride in a cool drizzle demands maximum breathability (a very low RET) above all else. In contrast, a long, steady endurance ride in changing conditions requires versatility, with features like pit zips and a two-way main zipper becoming more important than the absolute lowest RET score. These mechanical ventilation options provide a way to dump a large volume of heat and moist air quickly when you’re working hard, then seal up when the pace slows or the temperature drops.
For the daily commuter, the equation changes again. The pace is often variable, and the jacket may be worn over street clothes. This requires a good RET rating (ideally in the 6-13 range) but also a slightly looser fit to allow for air circulation and layering. Durability also becomes a higher priority. A delicate, ultra-light race jacket might not stand up to the daily grind of a backpack strap.
This table, based on recommendations from a guide to selecting rain jackets, helps align jacket features with different cycling scenarios. It’s a practical tool for diagnosing your needs and avoiding the dreaded overheating.
| Ride Type | Priority Features | Recommended RET Range | Key Ventilation |
|---|---|---|---|
| Short, Intense Ride (< 2 hours, high tempo) | Maximum breathability, lightweight, packable | RET < 6 | Full front zip, no pit zips needed due to short duration |
| Long, Steady Ride (endurance, club rides) | Versatility, ventilation options, comfort | RET 6-13 | Pit zips, 2-way main zip, adjustable cuffs essential |
| Daily Commute (variable pace, street clothes) | Durability, practicality, room for layers | RET 6-13 | Multiple ventilation points, looser fit over clothing |
| Cold Weather Training (< 10°C) | Thermal efficiency, wind protection | RET 6-13 | Minimal ventilation, focus on layering system |
Key Takeaways
- Breathability (RET rating) is more critical than waterproofing (HH rating) for cycling comfort. Aim for an RET below 12 for active use.
- Mechanical failure points like poorly taped seams and worn-out DWR coatings are a common cause of leaks, not the fabric itself.
- Jacket fit directly impacts aerodynamic efficiency and energy expenditure; a flapping jacket is a slow jacket.
How to Wash Technical Cycling Kit Without Ruining the DWR Coating?
There is a pervasive myth that you shouldn’t wash your waterproof jacket for fear of ruining it. The opposite is true: not washing your jacket is the fastest way to destroy its performance. As the technical team at INOV8 explains, contamination is the enemy of breathability. An analysis from the INOV8 technical team confirms, « The performance of a jacket diminishes over time. This decline is partly due to the accumulation of dirt, sweat, food, sunscreen, skin oils and various other foreign particles, which can infiltrate the fabric of a waterproof-breathable membrane. » These contaminants clog the micropores of the membrane and degrade the DWR coating, killing both breathability and water repellency.
Washing your technical gear is therefore not just about hygiene; it’s a critical maintenance procedure. However, it must be done correctly. Using standard laundry detergents is a catastrophic mistake. They contain surfactants and wetting agents designed to help water penetrate fabric—the exact opposite of what you want. These chemicals leave behind a hydrophilic (water-attracting) residue that completely neutralizes the DWR coating and can clog the membrane. Likewise, fabric softeners will strip the DWR and can permanently damage the membrane’s structure.
The correct procedure involves using a dedicated technical wash designed for waterproof garments. These cleaners effectively remove contaminants without leaving behind any performance-harming residues. Following the wash with a heat-activation cycle is the final, crucial step. The gentle heat of a tumble dryer or iron realigns the DWR polymers, causing them to stand up on end and effectively shed water once more. This step alone can often fully restore a jacket’s performance without the need for re-proofing.
Follow this foolproof washing guide to keep your gear working as intended:
- Prepare the Garment: Close all zippers, Velcro tabs, and flaps. This prevents them from snagging and reduces stress on the seams during the cycle.
- Use the Right Cleaner: Only use a dedicated technical wash. Never use regular detergent, bleach, or fabric softener.
- Rinse Thoroughly: Run an extra rinse cycle at the end of the wash to ensure every trace of the cleaning agent is removed.
- Activate with Heat: Tumble dry the jacket on a low or medium heat setting for 20-30 minutes. This step is non-negotiable as it reactivates the DWR coating. If you don’t have a dryer, you can gently iron the garment on a low setting with a towel in between.
- Store Properly: Avoid compressing the jacket for long-term storage (e.g., stuffed in a small bag). This can create permanent creases that weaken the fabric and cause seam tape to fail.
Now that you are equipped with an engineer’s understanding of how a waterproof jacket truly works, you can assess your needs and inspect potential gear beyond the marketing claims. Choosing the right moisture management system for your specific cycling intensity is the first and most critical step toward a comfortable, dry ride.