Contrary to the car park wisdom, you don’t need a massive enduro rig for Bike Park Wales; the right setup and a realistic maintenance budget are far more important.
- A well-sorted hardtail or shorter-travel (140mm) full suspension bike is often more engaging and faster on most UK trail centre runs.
- The hidden « Grit Tax » of UK winters—accelerated wear on pivot bearings and shocks—can add over £200 annually to the cost of a full-sus.
Recommendation: Before upgrading, honestly assess the travel you actually use and your willingness to commit to a rigorous, UK-specific maintenance schedule.
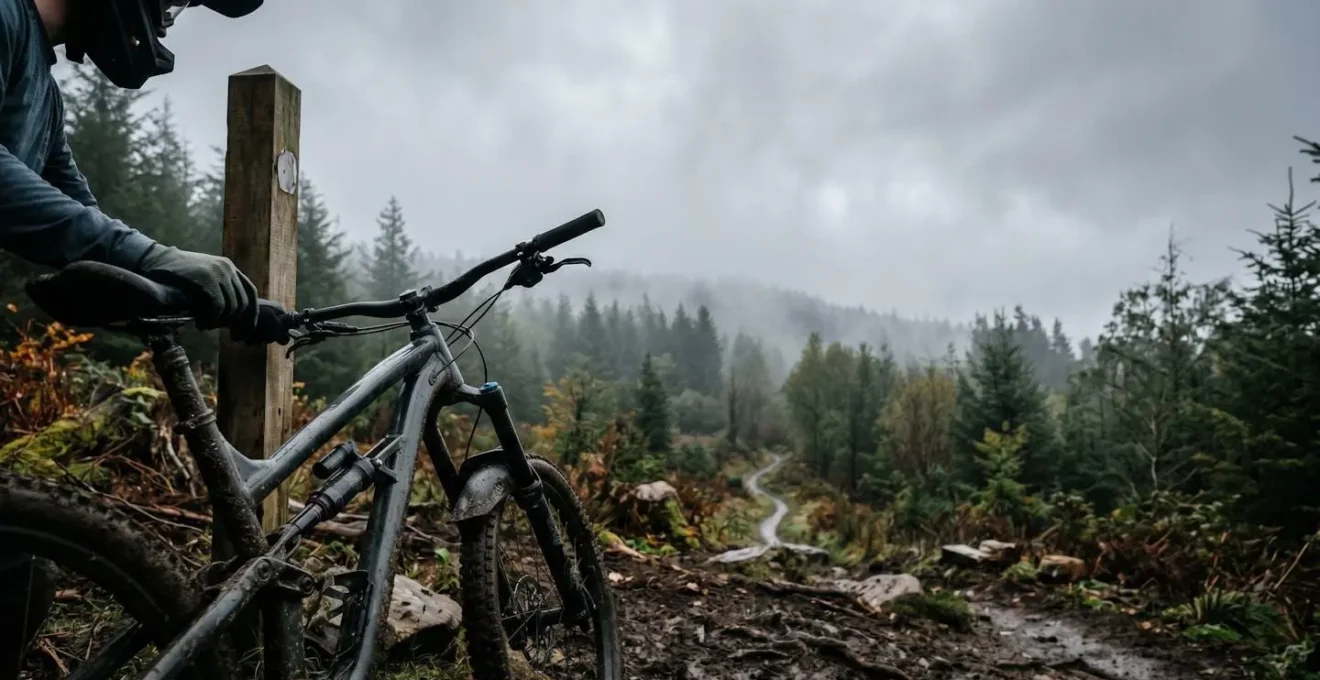
It’s the classic debate in every trail centre car park from Glentress to Afan, but nowhere more so than in the shadow of Bike Park Wales’ uplift. You see a rider on a shiny new 160mm enduro machine and the question hits: is my current rig holding me back? Is a hardtail just asking for a beating on trails like ‘Terry’s Belly’? The common advice is to get the biggest bike you can afford, assuming that more suspension travel automatically equals more speed and more fun.
This thinking, however, often overlooks the specific reality of UK riding. Our trails, even the black runs at BPW, are not Whistler. They are a unique blend of high-speed flow, man-made features, and, crucially, year-round grit and mud. The obsession with travel numbers ignores the far more critical factors of suspension setup, maintenance reality, and the sheer cost of keeping a complex linkage bike running smoothly through a wet Welsh winter.
What if the key to being a faster, more confident rider at UK trail centres isn’t about buying more travel, but about mastering the suspension you have and understanding the financial and mechanical « Grit Tax » that comes with it? This guide moves beyond the simple hardtail versus full-sus argument. We’ll break down how much travel you really need for UK enduro, why setup is everything, and the hidden costs that a bike shop won’t mention when you’re drooling over that new full suspension rig.
This article will guide you through the critical suspension and maintenance considerations for any rider looking to get the most out of their bike on UK trails. We will examine travel requirements, setup fundamentals, component choices, and the real-world costs that should influence your next bike purchase.
Summary: Hardtail vs Full Suspension for UK Trail Centres
- 140mm or 160mm Travel: How Much Do You Really Need for UK Enduro?
- Sag Setup 101: Why 25% Is the Sweet Spot for Most Air Shocks?
- Coil vs Air Shocks: Which Handles Muddy Winter Roots Better?
- The Hidden Service Costs of Owning a Full Suspension Bike in the UK
- When to Use Suspension Lockout: The Climbing Error Many Riders Make
- Single Pivot vs 4-Bar: Which Design requires Less Maintenance in Grit?
- The 1mm Rule: How to Check Pad Thickness Without Removing the Wheel?
- Maintaining Pivot Bearings: The Schedule for Muddy UK Winters
140mm or 160mm Travel: How Much Do You Really Need for UK Enduro?
The marketing machine constantly pushes us towards more travel. A few years ago, 140mm was the do-it-all trail bike standard; now, it’s 160mm or even more. But for the vast majority of UK trail centre riding, including the demanding tracks at Bike Park Wales, is that extra 20mm a genuine advantage or just a security blanket? The truth is, for most riders, it’s the latter. An overly long-travel bike can feel vague and unresponsive on smoother, faster-flowing blue and red trails, which make up the bulk of our mileage.
The key isn’t the total travel available, but the effective travel you use. A bike with 160mm of travel that you only ever use 75% of is essentially being lugged around for no reason. It’s heavier, often less efficient on climbs, and can mask feedback from the trail, hindering skill development. Many suspension experts agree that a well-configured 140mm is often the sweet spot for UK trail centres, providing enough capability for the roughest sections without compromising fun and agility elsewhere. The goal is to use most of your travel on the biggest hits of a typical ride, not to have reserves for a once-a-year trip to the Alps.
Before you decide you need a bigger bike, you need to know what you’re actually using. This simple audit will give you a clear, data-driven answer.
Your Action Plan: The Effective Travel Audit
- Push the O-ring down to the wiper seal on your fork and shock stanchions before riding.
- Ride your typical UK red or black trail at a normal pace, ensuring you hit representative features like drops, roots, and compressions.
- After the run, carefully measure the distance the O-ring has moved from the seal without bouncing on the bike.
- Calculate this as a percentage of your total travel (e.g., if the O-ring moved 120mm on a 160mm fork, you used 75%).
- If you’re consistently using less than 90% of your travel, a longer travel bike is unlikely to offer you any real-world benefit.
Sag Setup 101: Why 25% Is the Sweet Spot for Most Air Shocks?
You can have the most expensive fork and shock on the market, but if your sag isn’t set correctly, you might as well be riding a pogo stick. Sag is the percentage of suspension travel that compresses under your static weight. It’s the single most important adjustment you can make, as it dictates the bike’s geometry and how the suspension reacts to the trail. Too little sag, and the bike will feel harsh and skittish; too much, and it will wallow in its travel, pedal poorly, and be prone to bottoming out.
For most air-sprung trail and enduro bikes, 25% sag on the rear shock is the magic number to start with (forks are typically less, around 15-20%). This figure provides the best compromise between small-bump sensitivity and mid-stroke support. It allows the wheel to drop into holes and maintain contact with the ground (generating grip), while still preserving enough travel to absorb bigger hits and prevent the bike from feeling bogged down in compressions and berms. Getting this right requires you to be in the proper ‘attack position’ when measuring.
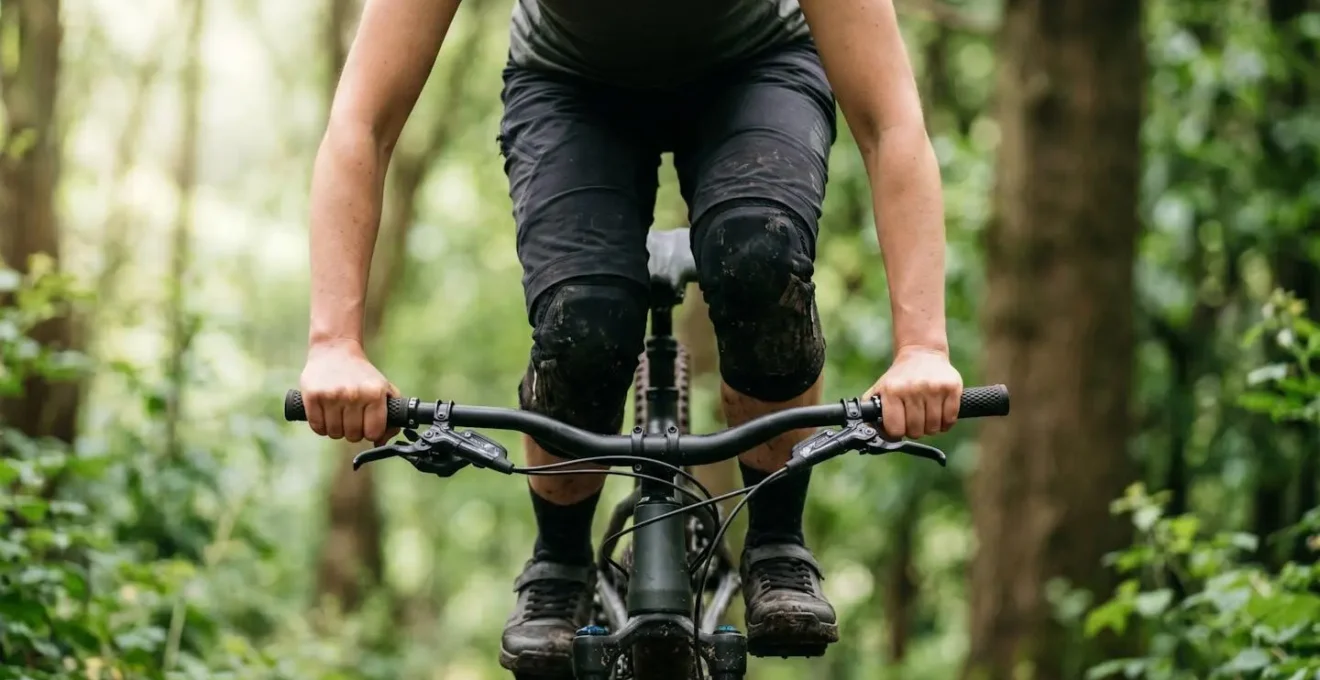
As the image demonstrates, this means standing on the pedals with your weight centred, elbows and knees bent, not just sitting on the saddle. This is your riding position, so this is how the bike must be balanced. A 25% setting ensures the suspension is in its most active and responsive zone, ready to smooth out the chattery roots and rocks that define so much of UK riding, ultimately providing more traction and control than simply having more travel available.
Coil vs Air Shocks: Which Handles Muddy Winter Roots Better?
The debate between coil and air shocks is another classic, but it takes on special significance in the UK. When you’re faced with a web of wet, greasy roots on a dark winter’s day, traction is everything. This is where the inherent characteristics of a coil shock often give it the edge. Due to their simpler design with fewer seals, coil shocks have less static friction, or ‘stiction’, than air shocks. This translates to superior small-bump sensitivity.
This means a coil-sprung rear end can react more quickly to small, rapid-fire impacts, allowing the wheel to track the ground with more accuracy. Instead of skipping over the tops of slippery roots, the tyre maintains contact, digging in and finding grip where an air shock might falter. As one test rider for Biker’s Edge noted during a comparison, this difference is palpable. They found that with a coil, the bike feels more planted and composed on chatter.
With the coil, the bike feels quieter. Also, the lack of friction in the initial stroke is pretty apparent. It reacts better to small bumps and chatter.
– Biker’s Edge Test Rider, Coil vs Air Shocks: MTB Suspension Explained
However, the choice isn’t clear-cut. Air shocks offer greater tunability (adjusting spring rate with just a shock pump) and a more progressive spring curve, which provides better bottom-out resistance on big hits and a more ‘poppy’ feel for jumping. The best choice depends on your priority.
Case Study: Canyon’s Terrain-Based Testing
Canyon’s field testing on technical terrain confirmed this trade-off. Their analysis revealed that on the rough, root-infested trails typical of the UK, coil shocks provide superior sensitivity and consistency, allowing the wheel to track the ground better and maintain traction where an air shock can feel harsh and skip. However, they also found that the progressive nature and ‘pop’ of an air shock made it faster and more playful on mixed trails that combined technical sections with berms, jumps, and flow elements.
The Hidden Service Costs of Owning a Full Suspension Bike in the UK
This is the conversation that rarely happens on the showroom floor. A full suspension bike offers undeniable performance benefits, but it comes with a significant, ongoing maintenance cost that is massively accelerated by UK riding conditions. This is the « Grit Tax »—the price you pay for riding through our glorious mud and rain. Every pivot in your suspension linkage is a potential entry point for water and grit, which grinds away at expensive bearings.
A simple hardtail has one set of bearings to worry about: the bottom bracket. A full suspension bike can have anywhere from four to ten or more pivot bearings, all of which will eventually need replacing. Add to that the mandatory annual servicing for the rear shock, which a hardtail doesn’t have. A basic fork or shock service can cost between £100-£150 per component at a UK bike shop. When you add the cost of a full pivot bearing replacement, the annual maintenance bill for a full-sus can be £150-£220 higher than for a comparable hardtail.
This table breaks down the typical annual service costs, highlighting the significant financial commitment required to keep a full suspension bike running smoothly in our climate.
| Service Item | Full Suspension (Annual) | Hardtail (Annual) | Difference |
|---|---|---|---|
| Fork lower leg service | £30-50 (2x) | £30-50 (2x) | Same |
| Rear shock service | £100-150 | N/A | +£100-150 |
| Pivot bearings (parts + labour) | £100-150 | N/A | +£100-150 |
| Wheel truing/repair | £30-40 | £50-80 | -£20 to -40 |
| Drivetrain (chain/cassette) | £80-120 | £80-120 | Same |
| Total Estimated Annual | £340-510 | £190-290 | +£150-220 |
When to Use Suspension Lockout: The Climbing Error Many Riders Make
Nearly every full suspension bike comes with a lockout or ‘climb switch’. The intuitive thinking is to flick it on for every climb, firming up the suspension to create a more efficient pedalling platform. On a smooth fire road, this is absolutely correct. However, on a typical UK technical climb—littered with roots, rocks, and loose gravel—this is one of the most common errors a rider can make. Locking out your suspension robs you of your greatest climbing aid: traction.
When your suspension is active, it allows the rear wheel to move up and over obstacles while the tyre stays pressed into the ground. This continuous contact is what generates grip. When you lock the suspension, the entire rear of the bike has to lift over every single root and rock. On a loose or wet surface, this momentary unweighting is often all it takes for the tyre to spin out, killing your momentum and forcing you to put a foot down. The small amount of energy lost to suspension movement (bob) is a tiny price to pay for the huge gain in traction and momentum on a rough climb.
This principle is a cornerstone of modern suspension design and setup advice. As the technical team at Liv Cycling explains, active suspension is your friend, both up and down the hill.
If your sag is set correctly, you will want your suspension active when climbing technical single track. Just as you want your suspension as active as possible when descending over rocks and roots, when climbing over the same features having suspension will help your tires stay on the ground and, therefore, increase your traction!
– Liv Cycling Technical Team, How to Set Up Mountain Bike Suspension
The lockout switch is a tool for smooth surfaces only. On anything technical, embrace the « active climbing » principle and let your suspension do the work it was designed for.
Single Pivot vs 4-Bar: Which Design requires Less Maintenance in Grit?
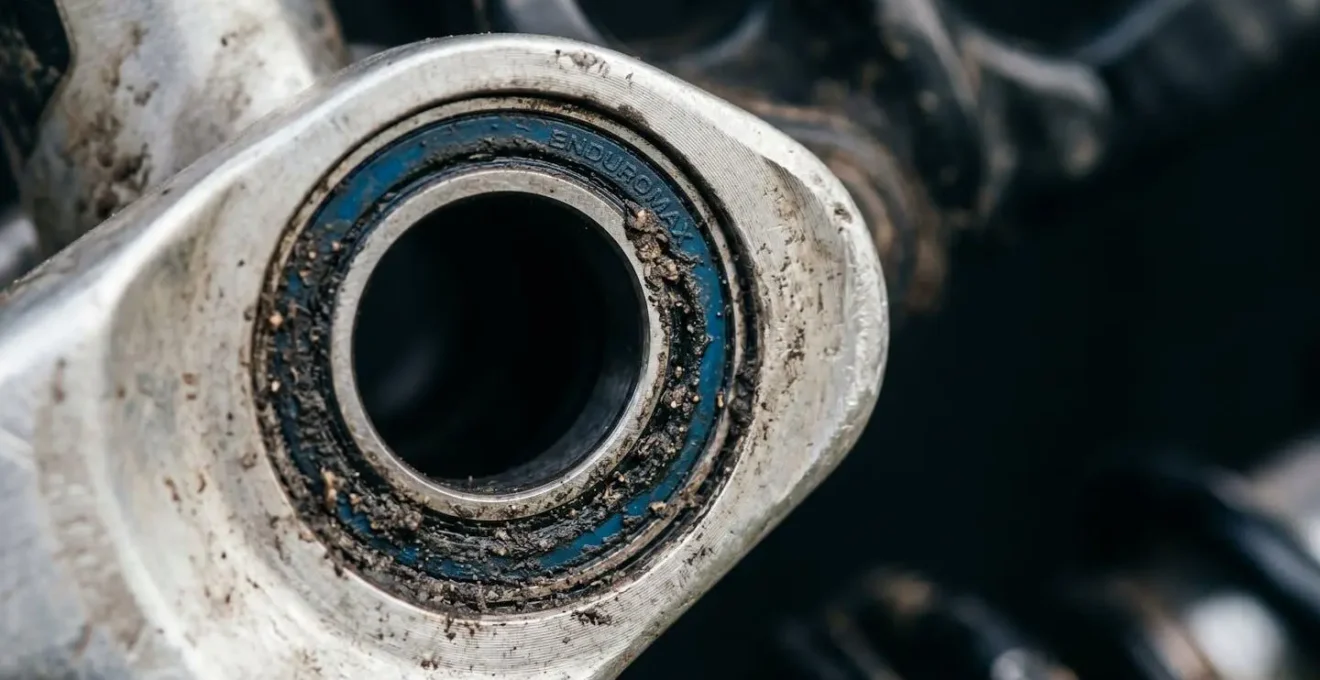
When considering the « Grit Tax, » it’s easy to assume that fewer pivots mean less maintenance. A single-pivot design, with just one main pivot location, seems logically superior to a complex 4-bar or Horst-link design with multiple moving parts. In theory, fewer bearings should mean a lower replacement cost and less faff. UK component pricing reflects this, suggesting you might spend over £50 on a set of bearings for a multi-link bike, versus much less for a single pivot.
However, the real-world answer is more nuanced. The critical factor isn’t the number of bearings, but their placement and sealing. A single pivot bearing placed directly in the line of fire from rear-wheel spray can wear out faster than a full set of well-shielded bearings on a more complex linkage. It’s about exposure to grit, not just quantity.
This highlights that you can’t judge a bike’s maintenance needs by its pivot count alone. You have to look at the design critically from a UK perspective.
Field Study: Bearing Exposure in UK Conditions
Testing in muddy UK trail centres reveals that the lower chainstay pivot on many Horst-link (4-bar) designs is the most vulnerable point on the entire bike. It sits low and directly in the path of grit and water flung from the rear tyre. While the overall design might be more sophisticated, this one weak point can become a major maintenance headache. Conversely, some single-pivot designs place their main bearing high and out of the direct spray pattern, leading to longer service intervals despite the design’s simplicity. The lesson is that bearing protection and placement are more important than bearing count when battling UK grit.
Ultimately, a simpler design is often easier for the home mechanic to service, but don’t assume it will automatically be more durable. Diligent post-ride cleaning of key areas is more important than the design itself.
The 1mm Rule: How to Check Pad Thickness Without Removing the Wheel?
Whether you’re on a hardtail or a full-sus, your brakes are your most important safety feature. In the wet and gritty conditions of a UK winter, brake pads can wear down at an alarming rate. Letting them wear down to the metal backing plate not only results in a terrifying loss of power but also quickly destroys your expensive brake rotors. A quick, regular check is essential, but pulling the wheel out to inspect the pads is a faff. Luckily, there’s a simple trick.
This is the « 1mm Rule, » and you can do it in 30 seconds with your phone. The goal is to visually inspect the amount of braking compound left on the pads. A new pad has about 2.5-3mm of material. The minimum safe thickness is about 1mm—roughly the thickness of a credit card. Any less, and it’s time for a replacement. Delaying can be costly, as quality replacement brake pads typically cost £23.99 or more, a small price compared to a new rotor.
Here’s how to perform the check without removing a single bolt:
- Position your phone’s torch so it shines into the back of the brake caliper, illuminating the gap where the rotor sits.
- Look down through the top of the caliper. You should be able to see the brake rotor and the pads on either side.
- Focus on the thickness of the pad material between the metal backing plate and the rotor.
- If the remaining compound looks thinner than a credit card (about 1mm), it’s time to change them. If it’s thicker, you’re good to go.
Make this quick check a part of your pre-ride ritual. It takes seconds and can save you a lot of money and a potentially dangerous situation on the trail.
Key Takeaways
- The ideal bike for UK trail centres is not defined by travel, but by efficient setup and a realistic maintenance plan.
- The « Grit Tax » is real: expect to spend £150-£220 more annually to maintain a full suspension bike in UK conditions compared to a hardtail.
- Proper sag (around 25% rear) and using active suspension on technical climbs provide more usable traction than simply having more travel or a firm lockout.
Maintaining Pivot Bearings: The Schedule for Muddy UK Winters
We’ve established the « Grit Tax » is a major factor in full-sus ownership. So, how do you manage it? The key is a proactive maintenance schedule, especially during the grim winter months. The fine, abrasive paste created by our soil and rain is incredibly effective at destroying bearings. As many UK mechanics will tell you, the wear rate is exponential in the wet.
1 hour in gritty, wet Welsh mud = 4 hours of dry, dusty riding
– UK Mountain Bike Mechanics, Typical full suspension bike service cost and interval
This means your service intervals must shrink dramatically from autumn to spring. A yearly check-up isn’t enough. You need to be checking for play in your pivots on a monthly basis, or even after every particularly grim ride. A tiny bit of side-to-side play is the first sign that a bearing is on its way out. Catching it early prevents damage to the frame itself and allows you to target a single bearing replacement, rather than a full, expensive kit.
The « Wiggle Test » is a simple, tactile way to check the health of your pivot bearings. It requires no special tools and gives you immediate feedback on the condition of your linkage.
- Hold the bike steady and grab the rear wheel, trying to move it from side-to-side. If you feel a knock or play, it could be the wheel hub or a pivot.
- To isolate the pivots, hold the rear triangle (chainstay or seatstay) and try to wiggle it relative to the main frame.
- Systematically work your way through each pivot point, holding the connecting links to feel for any movement, clicking, or roughness.
- A healthy pivot will feel completely solid and smooth. Any play, however small, indicates a worn bearing that needs attention.
So, before you decide the answer to your Bike Park Wales dilemma is a new bike, be honest with yourself. Are you prepared for the commitment? A meticulously maintained, well-set-up hardtail or shorter-travel trail bike will often be a more rewarding, reliable, and financially sensible choice for the reality of UK riding than a neglected, poorly configured enduro beast.