In summary:
- Training for a 50k is less about brute force and more about understanding your body’s signals.
- Start with slow, consistent rides (conversational pace) to build your aerobic base and prevent early burnout.
- Solve common pains like soreness and knee issues with proper bike fit and smart gearing, not expensive upgrades.
- Fuel your rides from the very beginning with a structured nutrition and hydration plan to avoid « hitting the wall ».
- Track progress with simple, no-tech tests to stay motivated and see your fitness improve week on week.
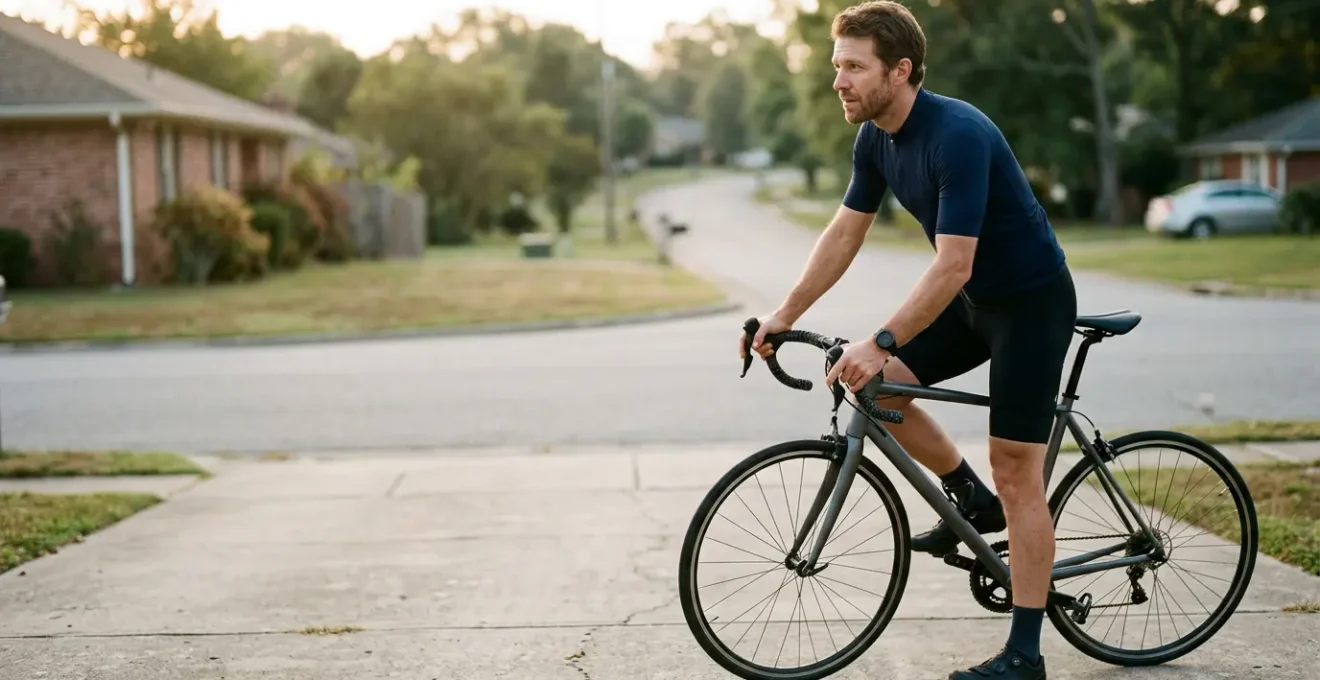
So you’ve done it. You’ve signed up for a charity bike ride—maybe it’s a local sportive or even the legendary London to Brighton—and the initial wave of excitement is slowly being replaced by a creeping sense of dread. The bike is gathering dust in the shed, and the thought of cycling 50 kilometres (about 31 miles) feels less like a fun day out and more like a monumental challenge. Your first few attempts at a ride might have ended with burning legs, a sore backside, and a serious question: « What have I let myself in for? »
Most beginners fall into the same trap: they think the only way to get fitter is to push harder on every single ride. They grind up hills in a tough gear, ignore the aches and pains, and end up injured, exhausted, or simply losing motivation. They see their body’s protests—the burn, the soreness—as a sign of failure, rather than what they truly are: signals. Important data that tells you exactly what you need to do next.
This guide is built on a different philosophy, one I’ve used to coach hundreds of riders just like you. The key isn’t to suffer more; it’s to train smarter. We’re going to decode those signals. We’ll turn that leg burn into a cue for pacing, transform saddle soreness into a lesson on bike fit, and understand the science behind hydration and nutrition. This isn’t just a plan; it’s your guide to learning the language of your cycling body, allowing you to build fitness systematically and arrive at the start line feeling confident, strong, and genuinely ready to enjoy the day.
This article will provide you with a structured, week-by-week approach to not just survive your first 50k, but to finish it with a smile. We will cover the most common pitfalls for new cyclists and give you the tools to overcome them, ensuring your journey to the finish line is as rewarding as crossing it.
Summary: Your 8-Week Path to 50k Success
- Why Do Your Legs Burn After Only 5 Miles and How to Fix It Quickly?
- Water vs Electrolytes: What Should You Drink on a Cool British Summer Day?
- Padded Shorts or Gel Saddle: Which Actually Solves Soreness for New Riders?
- The Knee Pain Error That Stops 30% of New Cyclists in Month One
- How to Track Fitness Gains Using Only a Stopwatch and a Local Hill?
- Zone 2 Fat Oxidation: Why Riding Slower Burns More Fat?
- Endorphins vs Dopamine: Understanding the « Cyclist’s High »?
- How to Finish a 100-Mile Sportive Without Hitting the Wall at Mile 70?
Why Do Your Legs Burn After Only 5 Miles and How to Fix It Quickly?
It’s the most common and disheartening feeling for any new cyclist. You set off full of enthusiasm, but within minutes your thighs are screaming. This isn’t a sign that you’re « unfit »; it’s a signal that you’re using the wrong energy system. Your body has two main engines: the fast-burning, high-intensity « anaerobic » engine, and the slow, sustainable « aerobic » engine. That burning sensation is lactic acid, the exhaust fume from your anaerobic engine, which you’ve fired up way too early. According to some research, anaerobic power systems are typically active for just 20 seconds to 3 minutes, designed for short, sharp sprints, not a 50k ride.
The mistake is trying to ride too fast, too soon. Your goal in the first few weeks is to teach your body to use its aerobic engine, which primarily burns fat for fuel and can go for hours. The solution is counter-intuitive: you need to slow down. You should be riding at a ‘conversational pace’, meaning you can hold a full conversation without gasping for breath. If you can only manage a few words, you’re going too hard.
For the first 2-3 weeks, commit to riding 3-4 times per week for 30-60 minutes at this easy pace. Don’t worry about speed or distance; focus only on time in the saddle at a low intensity. This builds your « aerobic base » – the foundation of all endurance fitness. By consistently riding at this level, you increase your body’s efficiency at using oxygen and burning fat, which gradually pushes that leg-burning threshold higher and higher. It’s the single most important change you can make to your training.
Water vs Electrolytes: What Should You Drink on a Cool British Summer Day?
Hydration seems simple—just drink when you’re thirsty, right? Unfortunately, that’s a recipe for cramp and fatigue. By the time you feel thirsty, you’re already dehydrated, and your performance has dropped. For a cyclist, hydration isn’t just about water; it’s a balancing act involving electrolytes, especially sodium, which are lost through sweat and are vital for muscle function. The question is, on a typical, often cool, British day, do you need a fancy sports drink or is plain water enough?
The answer depends on two factors: the duration and intensity of your ride. For a short, easy ride of under an hour, plain water is perfectly fine. Your body has enough stored electrolytes to cope. However, the moment you extend that ride beyond 60-90 minutes, or if the ride involves significant effort like climbing hills (regardless of duration), you need to start replacing lost salts. An electrolyte drink helps your body absorb fluid more effectively and prevents the muscle cramps that can be caused by a sodium imbalance.
To really dial in your strategy, you can even perform a simple sweat rate test at home. Weigh yourself (naked) before and after a one-hour ride, adding the weight of any fluid you consumed during the ride. Every 1kg of weight lost is equivalent to 1 litre of sweat. This gives you a personalised target for fluid intake per hour, helping you stay perfectly hydrated on event day.
This table provides a simple decision-making framework for your rides. As a rule of thumb, it’s always better to have an electrolyte drink and not need it, than to need it and not have it.
| Ride Duration | Intensity Level | Temperature | Recommended Drink | Amount per Hour |
|---|---|---|---|---|
| < 60 minutes | Low (conversational) | Cool (<20°C/68°F) | Plain water | 500 ml (16 oz) |
| > 60 minutes OR any duration | Moderate-High (includes hills) | Cool to Warm | Electrolyte drink | 750-1000 ml (25-33 oz) |
| Any duration | Any intensity | If you’re a ‘salty sweater’ (white residue on kit) | Electrolyte drink with higher sodium (500-1000mg/L) | Follow sweat rate test results |
Padded Shorts or Gel Saddle: Which Actually Solves Soreness for New Riders?
Saddle soreness is the second great barrier that stops new cyclists in their tracks. It’s a universal experience, and the immediate temptation is to buy a solution: a big, squishy gel saddle or the most expensive padded shorts. While quality padded shorts (often called bib shorts) are a fantastic investment, they are not a magic bullet. And that super-soft gel saddle? It’s often making the problem worse.
The real cause of most saddle soreness isn’t a lack of cushioning, but a combination of two things: improper bike fit and unconditioned sit bones. A wide, gel-filled saddle feels comfortable for five minutes, but on a longer ride, the gel displaces and creates pressure on soft tissues, which is far more painful than pressure on your sit bones. A proper, firmer saddle is designed to support your skeleton—specifically, your two ischial tuberosities, or sit bones. Your body just needs time to get used to it. Be patient, as research indicates that it typically takes around five to six rides for the soft tissue around your sit bones to adapt.
Before you spend any money, the number one priority is to check your saddle height. A saddle that is too high is the most common fit mistake, causing your hips to rock from side to side with every pedal stroke. This chafes your skin and creates constant friction. A saddle that’s too low puts excess pressure on your knees. Getting the height right is the single biggest step towards comfort.
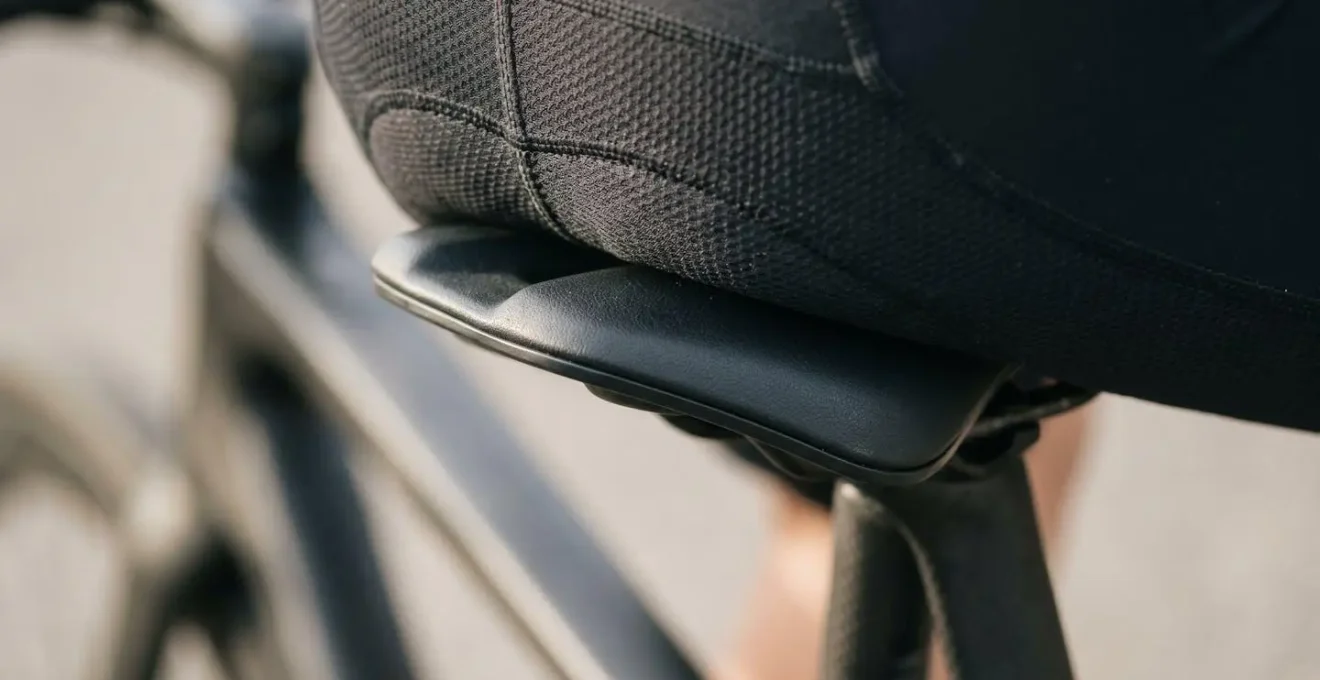
Once the height is correct, a good pair of padded shorts will make a world of difference. They work by providing a seamless, friction-free layer between you and the saddle, with padding precisely placed to support your sit bones. The solution isn’t more padding, but the right padding in the right place, combined with a bike that fits you correctly.
Your 5-Minute Saddle Height Checklist
- Sit on the saddle with the bike held steady, wearing your cycling shoes.
- Place your HEEL on the pedal and rotate it to the lowest point (6 o’clock). Your leg should be completely straight.
- Move the ball of your foot back to the pedal’s centre. Your knee should now have a slight, natural bend (around 25-30 degrees).
- Ask a friend to watch you pedal from behind. If your hips are rocking, the saddle is too high. Lower it by 3-5mm and re-test.
- Use a spirit level or a phone app to ensure your saddle is perfectly horizontal. A slight downward tilt of 1-2 degrees is the maximum acceptable adjustment.
The Knee Pain Error That Stops 30% of New Cyclists in Month One
While leg burn and saddle soreness are uncomfortable, knee pain is a red flag. It’s a sign that you’re not just working hard, but you’re potentially causing damage. It’s an incredibly common issue; according to a 2023 UK study, nearly half of all cyclists have experienced it. For beginners, the primary culprit is almost always the same: pushing too big a gear at too slow a rhythm. This is often called « grinding » or « mashing » the pedals.
Imagine trying to do a single squat with a very heavy weight versus doing 20 squats with no weight. The heavy squat puts immense strain on your knee joints, while the lighter squats build muscular endurance with far less stress. Cycling is the same. When you grind in a hard gear at a low cadence (e.g., 60 revolutions per minute or RPM), you are putting huge shear forces through your patella (kneecap) with every single pedal stroke. The solution is to shift to an easier gear and increase your cadence, aiming to spin your legs at around 80-90 RPM.
This does two things: it transfers the workload from your joints to your cardiovascular system, and it builds a more efficient, smoother pedal stroke. Your mantra for hills should be: spin to win. You must learn to shift into an easier gear *before* the hill starts, not halfway up when you’re already struggling. If the gear feels ‘just right’ at the bottom of a climb, it’s probably one gear too hard. It should feel slightly ‘too easy’ to begin with, allowing you to maintain your cadence as the gradient increases. This protects your knees and, as you’ll see later, is also a more efficient way to ride.
- Target Cadence: Aim for 80-90 RPM on flat ground. You can measure this by counting how many times one knee comes up in 15 seconds and multiplying by four.
- Pre-emptive Gearing: Shift down *before* you need to. Anticipate the change in terrain.
- Avoid Mashing: If your cadence drops below 75 RPM on a climb, you are in too hard a gear. Shift down immediately.
How to Track Fitness Gains Using Only a Stopwatch and a Local Hill?
After a few weeks of consistent training, you’ll start to feel better on the bike. But how can you be sure you’re actually getting fitter? Without expensive power meters or heart rate monitors, it can feel like guesswork. This is where a simple, structured test can be a huge motivational tool. All you need is a local hill and a stopwatch.
The goal of this test is not to smash your personal best every time, but to measure your improvement at a consistent, repeatable effort. This removes the variables of how you’re feeling on the day and gives you objective data. Pick a hill that takes you between 2 and 5 minutes to climb. It needs to be your « test hill »—you will use the same one every time.
Here is the protocol:
- Warm-up properly: Ride for at least 15 minutes at an easy, conversational pace before you get to the hill.
- Mark your start: Use a lamp post, a drain cover, or a specific tree as your exact start line.
- The Test: From a rolling start, begin timing as you pass your mark. Ride the hill at a « 7 out of 10 » effort. This should feel hard and breathless, but sustainable—an effort you feel you could hold for 20-30 minutes if you had to. Don’t go all-out.
- Record Everything: Stop the watch at the same finish point every time. Note down your time, the date, and a quick comment on the conditions (e.g., « strong headwind »).
Repeat this test every two weeks. By keeping your *perceived effort* the same (a 7/10), you will see your *time* naturally decrease as your aerobic fitness improves. Seeing your 4-minute, 30-second climb become a 4-minute, 10-second climb two weeks later is a powerful and concrete confirmation that your training is working. It’s the proof you need to keep going.
Case Study: The Power of a Structured Plan
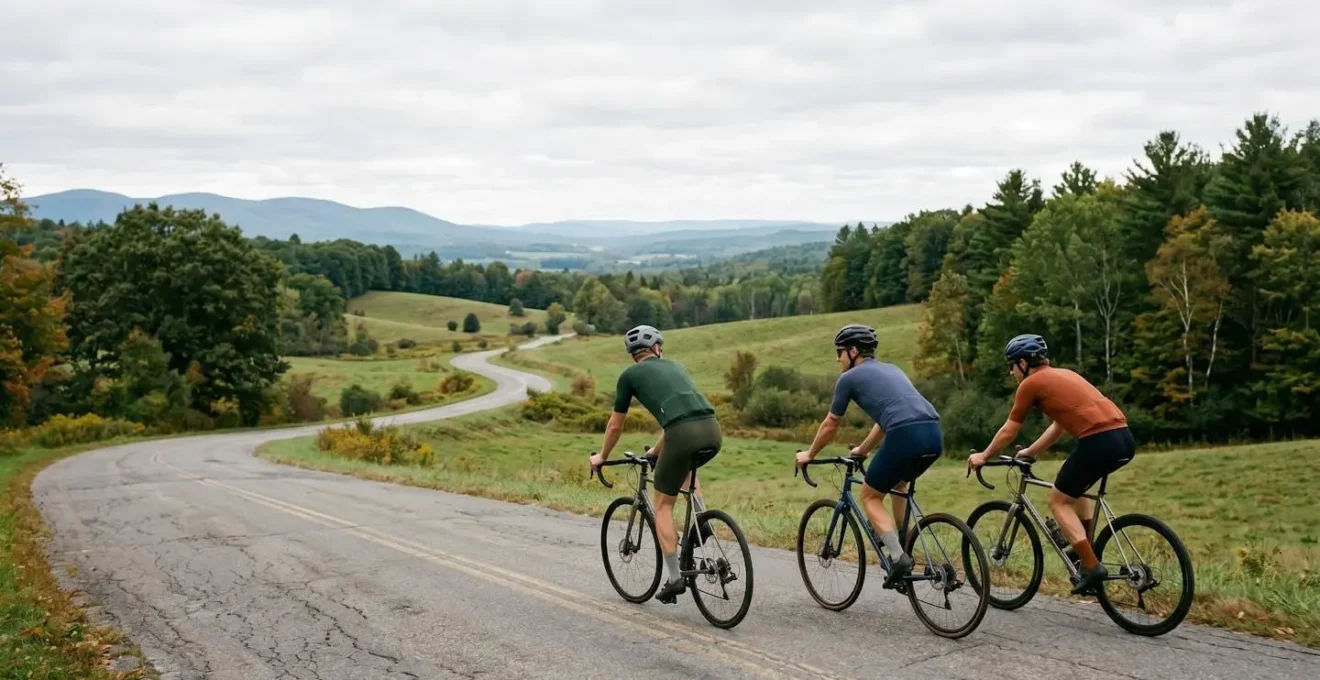
A training plan for a 100km charity ride, similar in structure to this 8-week plan, demonstrated clear benefits. Participants who followed the schedule of gradual increases in ride time, mixed in different types of terrain, and took planned rest days were consistently able to complete the long-distance event without « hitting the wall. » In contrast, riders who trained sporadically, often pushing too hard on every ride, were far more likely to struggle significantly or even abandon the event due to fatigue or injury, proving that a structured approach is the key to success.
Zone 2 Fat Oxidation: Why Riding Slower Burns More Fat?
Now we get to the science behind the « go slower to get faster » advice. Your body’s ability to perform endurance sport is determined by its metabolic efficiency—specifically, its ability to burn fat as a primary fuel source. This is what we are training when we do those long, slow « Zone 2 » rides. Zone 2 is simply a technical term for that conversational pace we discussed earlier, an effort level of about 4-6 out of 10.
At this low intensity, your body’s preferred fuel is fat. You have tens of thousands of calories of fat stored, an almost limitless supply. As you increase the intensity, your body begins to rely more and more on carbohydrates (glycogen), which are stored in your muscles and liver. Your glycogen tank is tiny—you only have enough for about 90 minutes of hard effort. Once it’s empty, you « bonk » or « hit the wall ».
The goal of Zone 2 training is to make your body so good at burning fat that you preserve your precious glycogen stores for when you really need them, like on a steep climb or for the final push to the finish line. By spending hours at this low intensity, you are telling your body to build more mitochondria (the « power plants » in your cells that burn fat) and become a more efficient fat-burning machine. This is why professional cyclists spend up to 80% of their training time riding at this surprisingly easy pace. They are building a huge, efficient aerobic engine.
For your 50k ride, this means you’ll be able to complete the distance comfortably by using your fat stores, feeling stronger for longer and reducing your risk of running out of energy. It’s the fundamental secret to all endurance sports. For context, some elite professional cyclists maintain their aerobic threshold at approximately 78-85% of their Functional Threshold Power (their max one-hour effort), a direct result of extensive Zone 2 training.
Endorphins vs Dopamine: Understanding the « Cyclist’s High »?
Everyone talks about the « runner’s high » or « cyclist’s high, » often attributing it to a flood of endorphins that produce a feeling of euphoria. While endorphins (your body’s natural painkillers) do play a role, especially after a long, hard effort, the real driver of habit formation is a different neurochemical: dopamine. Understanding how dopamine works is your secret weapon for staying motivated.
Dopamine is the « reward » chemical. Your brain releases it not just when you experience pleasure, but when you *anticipate* and *complete* a goal. This is the neurochemical loop that builds habits. The mistake most people make is setting goals that are too big, like « I have to ride 20 miles today. » If you’re tired and don’t achieve it, you get no dopamine release, and the habit is weakened. The trick is to create a « dopamine loop » with tiny, achievable goals.
Instead of a distance goal, make your goal incredibly simple: « I will get my kit on and ride for 10 minutes. » That’s it. The act of getting your kit on is a small win. The act of completing the 10 minutes is another. When you get back, perform a « completion ritual »—make a big red ‘X’ on a calendar, log the ride in an app, or text a friend. Each step triggers a small dopamine release, reinforcing the behaviour. You are training your brain to associate cycling with reward and accomplishment.
After a week or two, when the 10-minute habit feels automatic, you can extend it to 15, then 20 minutes. The habit is already formed; you’re just stretching it. This is how you build an unbreakable routine. You stop relying on willpower, which is finite, and start leveraging your brain’s own powerful reward system.
- Set Micro-Goals: Focus on the process (getting dressed, starting the ride) not the outcome (distance).
- Create a Completion Ritual: Mark your success immediately after every ride to trigger a dopamine release.
- Track Your Streak: A visual chain of successes on a calendar creates powerful motivation to not break the chain.
- Pair with a Reward: Have a favourite recovery drink or podcast ready for right after your ride to strengthen the positive association.
Key takeaways
- Your aerobic engine is your endurance engine. Train it by riding at a conversational pace (Zone 2) for the majority of your training time.
- Consistent hydration and early fuelling are non-negotiable. For rides over an hour, an electrolyte drink is essential. Start eating within the first 30 minutes.
- Comfort is paramount. A proper bike fit (especially saddle height) and quality padded shorts will solve most soreness issues, not a squishy gel saddle.
How to Finish a 100-Mile Sportive Without Hitting the Wall at Mile 70?
The title mentions 100 miles, but the principle of « hitting the wall » is just as relevant for your 50k charity ride. The « wall » (or « bonking ») is the debilitating feeling of total energy depletion that happens when your body runs out of stored glycogen. It can happen at mile 25 of a 31-mile (50k) ride just as easily as at mile 70 of a 100-mile ride. The cause is always the same: going out too fast and failing to fuel properly from the start.
You can be the fittest person in the world, but if you don’t eat and drink correctly, you will not finish. The two golden rules are: start fueling early and fuel consistently. Do not wait until you feel hungry or thirsty. By then, it’s too late; you are already in a deficit. Your fueling strategy should begin within the first 20-30 minutes of the ride.
The simplest and most effective method is the « clockwork » protocol. Set a repeating alarm on your watch for every 20 or 30 minutes. Every time it goes off, it’s a non-negotiable reminder to do two things: take a sip of your drink and take a small bite of food. Your target should be to consume 30-60 grams of carbohydrates per hour. This could be one energy gel and a few sips of sports drink, or half a banana and some water. The key is the relentless consistency. This drip-feeds your system, keeping your glycogen stores topped up and preventing the dreaded bonk. It’s crucial to use your 8-week training period to test the exact foods and drinks you plan to use on event day. Never try anything new on the day of the ride!
This disciplined approach to pacing and nutrition, combined with the aerobic base you’ve built, is what will get you to the finish line feeling strong. While your goal is 50k now, it’s worth noting that for a full 100-mile (160km) event, USA Cycling recommends that beginners train for a minimum of 12-16 weeks, which shows how these foundational principles scale to bigger challenges.
Your charity ride is an incredible goal, and you are more than capable of achieving it. The journey starts not with a punishing, painful effort, but with the first smart, structured ride. It’s time to follow the plan, listen to your body, and begin the process. Get your kit on, and let’s get started.